In this article, I will explain how to implement an effect, “screen shake”, in 2D games. It is not an absolutely necessary element of a game, but if used well, it can make the player’s game experience more interactive and directly affect the user experience. For example, there are many situations where it could be used, such as when a player fires a gun, takes damage from enemies, or falls from a high place.
By the way, this kind of element that is not necessary but makes the game more interesting by adding it is called “game juice” in English. I have one more vocabulary in English, and I am a little wiser now.
There are already many resources on the Web that explain how to implement screen shake, and of course there are methods other than those introduced here. This time, we refer to the following video and article in particular, so please check them as well for a deeper understanding.
Reference
YouTube: GDC - Math for Game Programmers: Juicing Your Cameras With Math
KidsCanCode: SCREEN SHAKE
The project file that will be created at the end of this tutorial is located in the GitHub repository
. You can also check the project directly by downloading the .zip file and importing the “project.godot” file in the “End” folder with the Godot Engine.
Environment
・Godot version: 3.4.4
・Computer OS version: macOS 11.6.5
Preparation
Creating a new project
Start Godot Engine and create a new project. You can name your project as you like. If you can’t think of one, let’s call it “Screen Shake”.
Updating project settings
Once the editor appears, we should update project settings for the entire project.
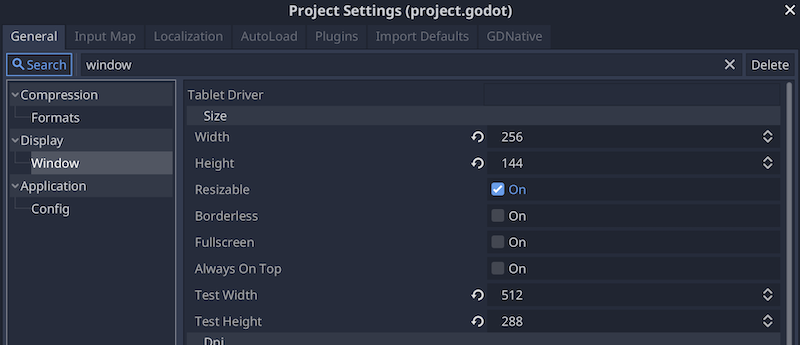
First, set the display size of the game. In this case, we will use a ratio of 9:16, with 16 px as the base value.
Open the “Project” menu > “Project Settings”.
In the “General” tab, search for “window” and select “Display” > “Window” in the sidebar.
In the “Size” section, change the values of the following items
- Width: 256
- Height: 144
- Test Width: 512
- Test Height: 288
In the “Stretch” section, change the values of the following items
- Mode: 2d
- Aspect: keep

Switch to the “Input Map” tab and add “shake” to the action.
Assign the “space” key to the “shake” action.

Downloading and importing assets
Next, let’s download assets from KENNEY’s site and use them. This time, we will use an asset pack called “Tiny Dungeon ”. I will use the tileset included in this asset. I can’t help but be grateful for this wonderful free material.
Once downloaded, drag “/kenney_tinydungeon/Tilemap/tilemap_packed.png” to the file system dock and import it into your project.
Immediately after importing the file, the image will look blurry, so correct this by following the steps below.
- Make the imported asset file selected in the file system dock
- Select “Preset” > “2D Pixel” in the import dock.
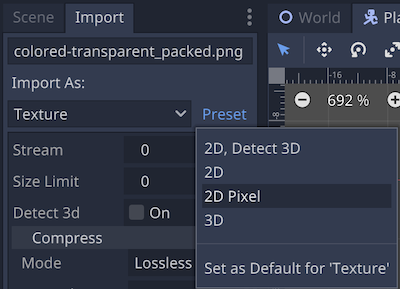
- Click the “Reimport” button at the bottom.

The image should now have the edges characteristic of pixel art. The imported tileset will be used later when creating the tile map.
Translated with www.DeepL.com/Translator (free version)
Creating Camera scene
Creating a new scene
First, let’s create a Camera scene.
Select “Scene” menu > “New Scene”.
Select the “Camera2D” class node as root node and rename it to “Camera”.
Save the scene at this point. Create a folder and save the scene with the file path “res://Camera/Camera.tscn”.
The scene tree has no child nodes, so the scene dock should have only the “Camera” node as follows.

Editing the properties of the Camera node
Continue to make the following edits in the inspector:
- Set the “Current” property to On.
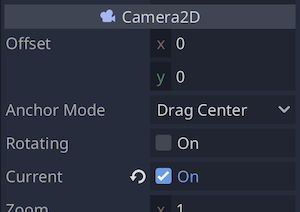
- Set the “Limit” property to the display size.

Attaching and editing a script to a Camera node.
Attach a new script to the Camera node. Create a script file with the file path “res://Camera/Camera.tscn”.
This time, we will implement two types of shaking: “rough shake” and “smooth shake”. First, let’s start with “rough shake” whose code is relatively simple.
The script should contain the following code.
###Camera.gd###
extends Camera2D


# Shaking intensity (from 0.0 to 1.0)
var trauma = 0.0
# Exponent for power of shaking strength
var trauma_power = 2
# Put the shaking strength trauma as a power exponent trauma_power
var amount = 0.0

# Shaking intensity that decays in 1 second
# Note that if it is less than 0.0, the shaking will last forever
var decay = 0.8
# Maximum shaking width
# Hold each value in x-axis direction and y-axis direction as one data in Vector2 type
var max_offset = Vector2(36, 64) # display ratio is 16 : 9
# Maximum angle of rotation (in radians)
var max_roll = 0.1


# Built-in function called first when node is loaded
func _ready():
    # Randomize seed values for functions that return random values
    # Required since the same seed value will result in the same number of values obtained
	randomize().


# Built-in process function called every frame
func _process(delta):
    # If trauma is greater than 0
	if trauma:
        # Decay the intensity of the shaking
		trauma = max(trauma - decay * delta, 0)
        # Call a method to set the shaking width and rotation angle for rough shake
        # Call this method every frame to express screen shake
        rough_shake() # Define after this


# Method to set the shake width and rotation angle of rough shake
func rough_shake():
    # Amount is a cumulative value of the shaking intensity
    # pow() function raises the first argument to the power of the second argument as an exponent
    # The closer the intensity of the shaking to 0, the smaller the value becomes when powered
    # Example: 1.0 * 1.0 = 1.0, 0.5 * 0.5 = 0.25, 0.1 * 0.1 = 0.01
	amount = pow(trauma, trauma_power)
    # rotation angle = max_roll * amount * trauma power * random value from -1 to 1
	rotation = max_roll * amount * rand_range(-1, 1)
    # x-axis swing width = maximum swing width in x-axis direction * swing strength multiplied by power * random value between -1 and 1
	offset.x = max_offset.x * amount * rand_range(-1, 1)
    # y-axis amplitude = max_offset.x * amount * rand_range(-1, 1) * random value between -1 and 1
	offset.y = max_offset.y * amount * rand_range(-1, 1)


# Methods to set trauma
func set_shake(add_trauma = 0.5):
    # Add the value of the argument add_trauma to the current trauma value
    # Set trauma to 1.0 if it is greater than or equal to 1.0
	trauma = min(trauma + add_trauma, 1.0)


# Built-in functions to handle input
func _unhandled_input(event):
    # If we press the action "shake" key on the input map
	if event.is_action_pressed("shake"):
		# Call a method to set trauma
        set_shake()
The “rough screen shake” script is now complete.
Creating World scene
World Create a new scene and add the necessary nodes.
The Camera scene alone does not show the shaking because there is no image. To check the shaking, we will create a World scene and prepare an instance of the Camera scene and a node that will serve as the background.
- Select “Scene” menu > “New Scene”.
- Select “Node2D” as the root node and rename it to “World”.
- Save the scene with the file path “res://World/World.tscn”.
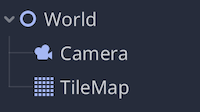
Then add nodes so that the World scene becomes the following scene tree.
- World (Node2D)
- Camera (Camera2D、instance of Camera scene)
- TileMap
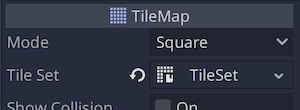
Editing the TileMap node
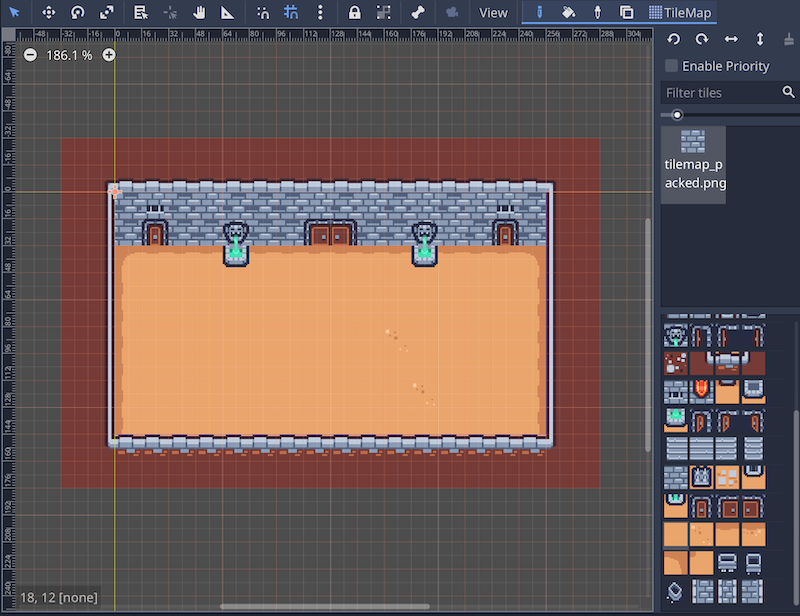
Let’s quickly create a tile map for the background.
- Apply a new tileset resource to the “Tile Set” property of the “TileMap” node.
- Open the Tile Set panel, drag the “res://Assets/tilemap_packed.png” resource file downloaded from KENNEY to the left side, and set tiles appropriately with a single tile or atlas.
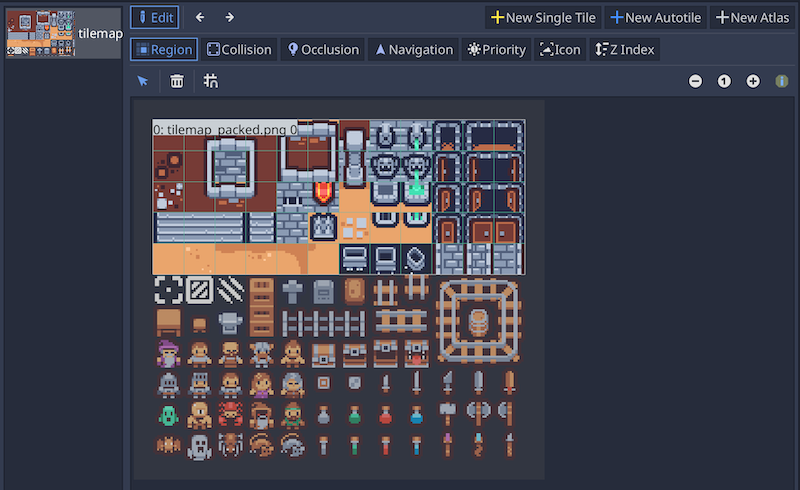
- Select “TileMap” in the scene dock to create a tile map. The area should slightly exceed the display size.
Testing “rough shake”
Finally, run the project to test the “rough shake”. If you are running the project for the first time, select “World.tscn” as the main scene of the project.
Press the space key to shake the screen. Wait a little and press it, or press it continuously without a pause to check the behavior.
There is no particular discomfort, and it looks reasonably good. However, compared to the smooth shake that will be implemented later, it should look a bit rough.
Adding “smooth shake” code to the script for the Camera node
From here, we will implement the “smooth shake”. Return to the Camera scene and add the code to the attached “Camera.gd” script.
smooth shake uses the following image called noise.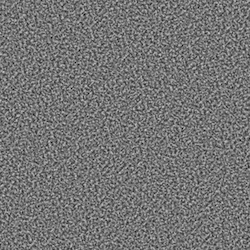
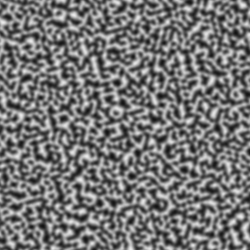
The noise image has a random distribution of white, gray, and black. The noise value varies from -1 to 1, with -1 for black, 1 for white, and 0 for intermediate gray. The idea is to specify the coordinates of a pixel on the noise, get the noise value of that pixel, and apply it to screen shake.
Godot provides a class (resource) called OpenSimplexNoise. You can create a new class in your script and use the get_noise_2d method, which is built into the class of this resource, to obtain the noise value at the specified coordinates by passing x-coordinate and y-coordinate as arguments. This time, the x-coordinate passed as the argument is specified randomly, the y-coordinate is shifted by 1 pixel, the noise value is obtained, and it is multiplied by the calculation of the shaking width to reproduce smooth shake.
By the way, you may intuitively understand how the noise changes when you change some parameters that compose the noise by trying various things on the following demo page using Godot’s OpenSimplexNoise.
Reference
OpenSimplexNoise Viewer
The noise may seem a bit complicated, but let’s write a script for a start. In addition, we will make it possible to switch between “rough shake” and “smooth shake”.
###Camera.gd###
extends Camera2D

# Define the type of screen shake with enum
enum {
	ROUGH, # for rough shake
	SMOOTH # for smooth shake
}

## Common properties
var type = ROUGH # Type of screen shake (default is rough shake)
var trauma = 0.0
var trauma_power = 2
var amount = 0.0

## rough shake properties
var decay = 0.8
var max_offset = Vector2(36, 64)
var max_roll = 0.1

## smooth shake property
var noise_y = 0 # y-coordinate of noise
onready var noise = OpenSimplexNoise.new() # Instance of noise


func _ready():
	randomize().

    ## Use following 3 variables for smooth shake
	# Value that determines the noise's unique random appearance (assign a random integer)
    # If the seed value changes, the placement of the white to black dots in the noise will also change
	noise.seed = randi()
    # Number of layers to create noise (in this case 2)
    # The higher the value, the more layers of gray between black and white, the more detailed the noise
	noise.octaves = 2
    # Period of the noise (let's say 4)
    # The smaller the value, the higher the noise frequency
	noise.period = 4


func _process(delta):
	if trauma:
		trauma = max(trauma - decay * delta, 0)
        # If the type is rough shake
		if type == ROUGH:
            # Call methods to set the shake width and rotation angle for rough shake
			rough_shake()
        # If the type is smooth shake
		elif type == SMOOTH:
            # Call methods to set the shake width and rotation angle for smooth shake
			smooth_shake()


func rough_shake():
	amount = pow(trauma, trauma_power)
	rotation = max_roll * amount * rand_range(-1, 1)
	offset.x = max_offset.x * amount * rand_range(-1, 1)
	offset.y = max_offset.y * amount * rand_range(-1, 1)


# Methods to set the shaking width and rotation angle for smooth shake
func smooth_shake():
    # Amount is the trauma multiplied by a power
	amount = pow(trauma, trauma_power)
    # Increase the y-coordinate of the noise by 1 pixel
	noise_y += 1
    # Get a random rotation angle using the noise value obtained from the noise seed value as x-coordinate
	rotation = max_roll * amount * noise.get_noise_2d(noise.seed, noise_y)
    # Get a random x-axis swing width using the noise value obtained by multiplying the noise seed value × 2 by the x-coordinate
    # 2 multiplied by the seed value is an appropriate number to get a noise value different from the rotation angle or y-axis swing width
	offset.x = max_offset.x * amount * noise.get_noise_2d(noise.seed * 2, noise_y)
    # Get random y-axis shaking width using noise seed value x 3 obtained as x-coordinate
    # 3 multiplied by the seed value is an appropriate number to get a noise value that is different from the rotation angle and the x-axis wobble width
	offset.y = max_offset.y * amount * noise.get_noise_2d(noise.seed * 3, noise_y)


func set_shake(add_trauma = 0.5):
	trauma = min(trauma + add_trauma, 1.0)


func _unhandled_input(event):
	if event.is_action_pressed("shake"):
		set_shake()
    # Toggle screen shake type when right or left arrow key is pressed
	if event.is_action_pressed("ui_right")\
	or event.is_action_pressed("ui_left"):
        # if the current screen shake type is rough shake
		if type == ROUGH:
            # change to smooth shake
			type = SMOOTH
        # if current screen shake type is smooth shake
        else:
            # change to rough shake setting
			type = ROUGH
Adding nodes to the World scene
Add a “CanvasLayer” node and its child “Label” node to the World scene tree to make it easier to see which type of screen shake is being used on the screen. The name of the “Label” node is “TypeLabel”.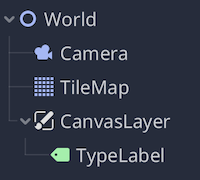
With the “TypeLabel” node selected, enter “ROUGH” as the initial value for the “Text” property in the inspector.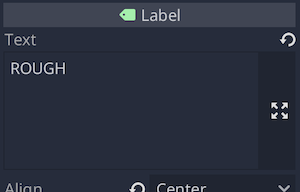
In the “Theme Overrides” > “Color” > “Font Color” property, set the font color to #000000 (black).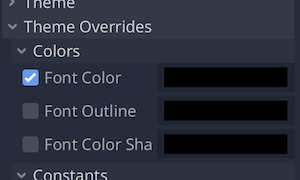
Select “Center” from the “Layout” on the 2D workspace toolbar and center the “TypeLabel” node.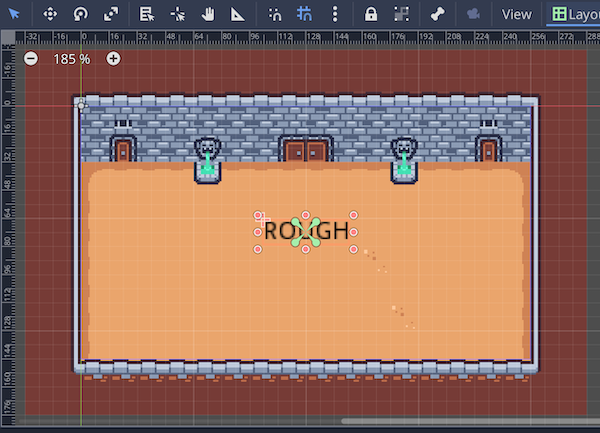
Attach the script to the “World” root node and save the file path as “res://World/World.gd”. In the script, write the following code for the operation to switch the type of screen shake.
###World.gd###
onready var type_label = $CanvasLayer/TypeLabel

func _unhandled_input(event):
	if event.is_action_pressed("ui_right")\
	or event.is_action_pressed("ui_left"):
		if type_label.text == "ROUGH":
			type_label.text = "SMOOTH"
		else:
			type_label.text = "ROUGH"
The left and right arrow keys can now be used to switch between ROUGH (rough shake) and SMOOTH (smooth shake).
Test “smooth shake” and compare with “rough shake”
Finally, let’s run the project again to check the behavior of the “smooth shake” and compare it with the “rough shake” while switching the shaking type.
This completes the implementation of screen shake. I hope you could feel the difference. It may seem like a small difference, but if you are concerned about the presentation of the game, you will want to use the appropriate shaking for the scene.
Sample projects
In addition, we have prepared a separate project that makes it easier to visually understand the state of screen shake. Please try it if you like.
The sample project file is located in the GitHub repository
. Please download the .zip file from there. You can check it by importing the “project.godot” file in the “Sample” folder with the Godot Engine.
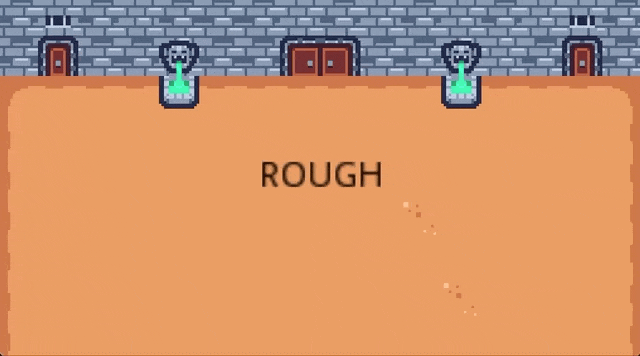
The specifications of the sample project are as follows.
- Gauge
amountandtraumaproperties. - Add a character that can be moved up, down, left, or right by keyboard operation.
- D key: right
- A key: left
- W key: Up
- S key: Down
- Adding multiple spikes on the ground that cause the screen to shake when a character steps on them.
- Adding a value to the
traumais increased by 0.1 with the up arrow key and decreased by 0.1 with the down arrow key (maximum 1.0, minimum 0.0). - Display “ROUGH” and “SMOOTH” shaking types in the upper left corner.
- Use the left and right arrow keys to toggle between “ROUGH” and “SMOOTH” shaking.
- Space key also generates screen shake.
Conclusion
In this article, we introduced the implementation of screen shake in 2D. Although the game genre and scene may vary, there will be many opportunities to apply screen shake. If you understand how to change the parameters that constitute screen shake, you should be able to express screen shake in a way that best suits the purpose of use.
References
- KENNEY - Assets
- Godot demo projects - OpenSimplexNoise
- KidsCanCode: SCREEN SHAKE
- YouTube: Math for Game Programmers: Juicing Your Cameras With Math
- YouTube: Godot Game Juice Tutorial 1: Camera Shake and Frame Freeze
- Coding Kaiju - Screen Shake in Godot: The Best Way