In the previous article 🤖 Adding Game Center Plugin to Your Project , I explained how to add the Game Center plugin from the official Godot iOS plugins to your project. In this article, I’ll guide you on implementing the functionalities of Apple’s Game Center using the added plugin.
If you’re wondering what Game Center is all about, I briefly explained it in the beginning of the previous article, so you might want to check that out first.
Broadly, I’ll explain in two main sections:
- Setting Up Game Center in App Store Connect
- Implementing Game Center in GDScript
By the way, the basic usage of plugins is documented in Godot Docs / iOS plugins / iOS plugins , so it would be reasonable to start there.
Also, you can find the code for the Game Center plugin on GitHub at Godot iOS GameCenter plugin . If you want to delve into the details, you can check it out. Personally, I found it a bit challenging at first.
Environment at the Time of Writing
Godot Version: 4.2.1
Computer Model: MacBook Air M1, 2020
OS: macOS 14.4.1
Uploading Build from Xcode to App Store Connect
First and foremost, you need to upload the project exported from Godot to App Store Connect via Xcode. For specific steps, refer to another article 🤖 Distributing Your Game to the App Store from Xcode . It explains how to enable Game Center features in Xcode as well.
Setting Up Game Center in App Store Connect
Start by accessing App Store Connect and selecting the app you want to link with Game Center. Then, navigate to the Game Center section in the sidebar to open the Game Center editing page. From there, you can easily add Leaderboards and Achievements. It’s quite straightforward.
Below is a screenshot with Leaderboards and Achievements already added. Initially, they will be empty.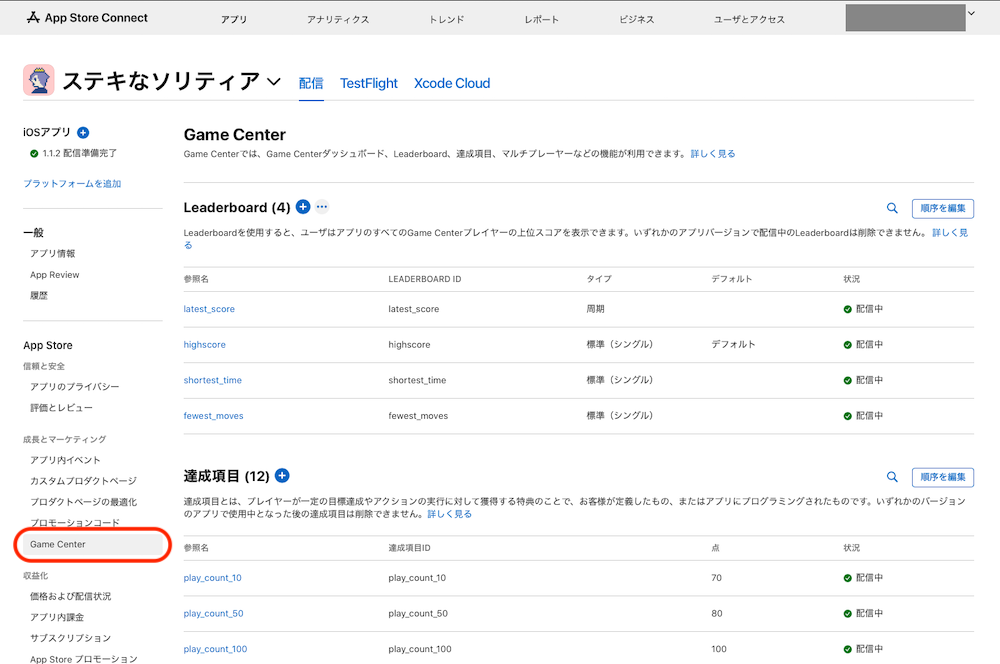
Setting Up Leaderboards
Leaderboards allow players from around the world to compete with each other through scores shared via Apple’s Game Center. Follow these steps to set up Leaderboards:
- Click the (+) button for Leaderboard.
- Decide on a Reference Name and Leaderboard ID. Keeping them the same is advisable.
- Choose between Standard Leaderboard and Periodic Leaderboard. The former retains scores indefinitely until the Leaderboard is deleted, while the latter resets scores periodically. You can set the reset interval later.
- Set the score format, score range, score submission type, and order. For clarity, it’s recommended to format scores as integers, set the score range from a minimum of 0 to a generous maximum, and arrange them in descending order if higher scores are better.
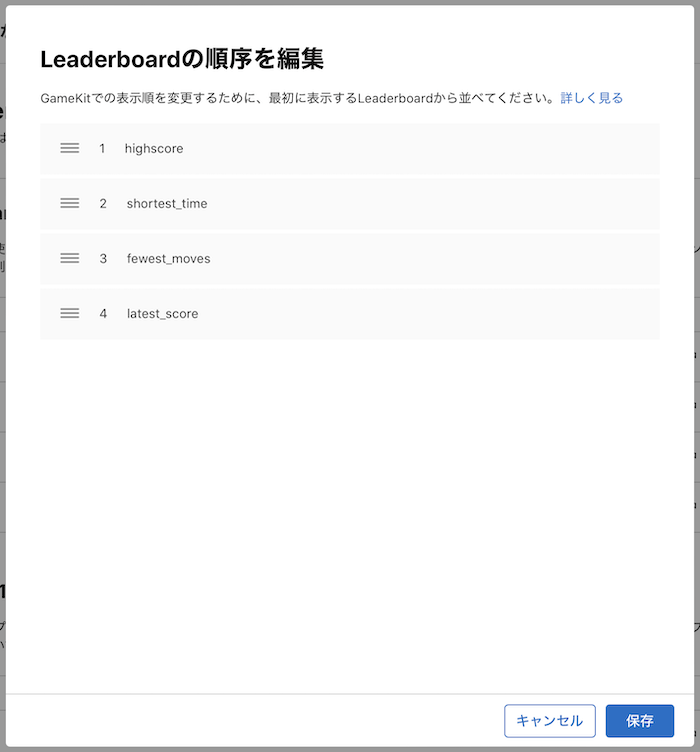
Continue adding as many Leaderboards as needed. It’s easy. For example, setting up scores for shortest clear time or number of defeated enemies can motivate players. Feel free to brainstorm and add whatever comes to mind. You can reorder them anytime.
Setting Up Achievements
Achievements allow players to set goals during gameplay and prove their accomplishments. For instance, you can prepare achievements for defeating mid-bosses or reaching milestones in character growth, encouraging players to continue playing. Adding elements like item collection achievements or defeating a certain number of enemies can enhance the game’s longevity.
To add Achievements, follow these steps:
- Click the (+) button for Achievement.
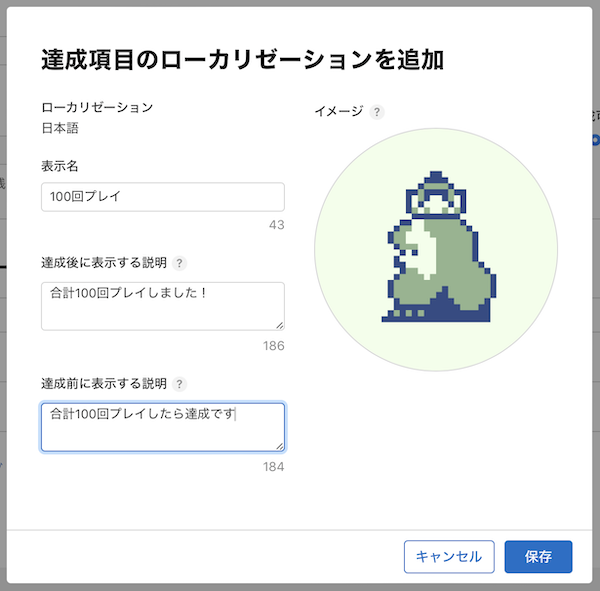
- Input a Reference Name and Achievement ID in the opened panel, then click Create. It’s recommended to keep them consistent for clarity.
- Once the editing screen opens, set “Points,” “Hidden,” and “Can Be Earned Multiple Times” in order. Click the (?) button if you’re unsure about any settings. If you plan to create multiple achievements, remember to distribute a total of 1,000 points among them, allocating them wisely.
Continue by adding localizations for each language your game supports. You don’t need different images for each language; one image per achievement is enough, meeting the specified requirements.
Once you’ve added localizations, it will look something like this.
Possible achievements could include “Number of Clears,” “Playtime,” “Rare Items Obtained,” or “Skills Unlocked.” It’s advisable to list all achievements first, determine point allocations, and then proceed with the setup. Adding achievements later might require reallocating points, which can be tedious.
Coding with the Game Center Plugin
Now let’s explain how to code the Game Center features in GDScript.
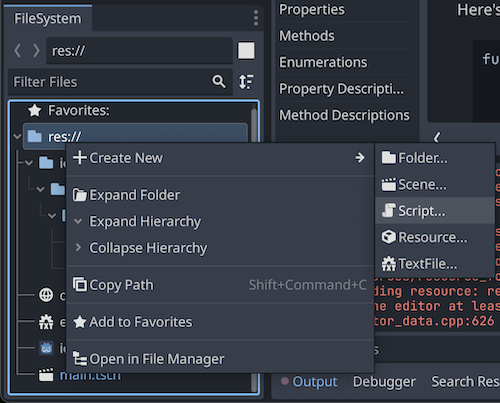
First, let’s create a script in the project with a name like game_center.gd. You can add it by right-clicking in the file system dock.
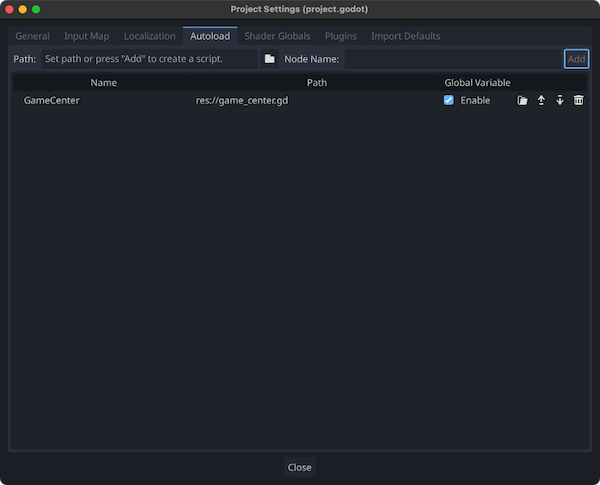
You’d want to load this script as soon as the game starts. To do that, go to Project > Project Settings… > Autoload tab, and add the script you created. This way, the script will be loaded when the game starts.
Next is the implementation of the crucial script. In the game_center.gd script, we’ll implement the Game Center functionality. Initially, let’s declare a variable for the Game Center plugin, for example, game_center.
extends Node

# Game Center plugin
var game_center = null
Next, within the _ready() function, let’s add the part for getting and authenticating the plugin right after the game starts. The code would look something like this:
func _ready():
    if OS.get_name() == "iOS":
        if Engine.has_singleton("GameCenter"):
            print("Found GameCenter plugin")
            game_center = Engine.get_singleton("GameCenter")
            var res = game_center.authenticate()
            print("Authentication: ", res)
        else:
            print("There is no GameCenter plugin")
- First, we check if the OS is iOS using
OS.get_name()to retrieve the OS name. - If the OS is iOS, we also check if the GameCenter plugin exists using
Engine.has_singleton("GameCenter"). - If the plugin is found, we retrieve it using
Engine.get_singleton("GameCenter")and assign it to the variablegame_center. - Then, we proceed with authentication by calling the built-in
authenticate()function of the Game Center plugin. This function returns the authentication result, which we store in the variableresfor easier debugging.
So far, this sets up the groundwork for implementing Game Center functionality. Next, we’ll explain the implementation of Leaderboards and Achievements functionalities, each in order.
Implementing Leaderboards
Let’s start with Leaderboards. We’ll explain with a straightforward example.
First, define a function to update the leaderboard. Let’s name it update_leaderboard().
func update_leaderboard(score:int, category:String):
    print("call update_leaderboard()")
    if not game_center:
        print("No Game Center plugin")
        return

    if not game_center.is_authenticated():
        print("not authenticated, authenticating again")
        game_center.authenticate()

    var data = {"score": score, "category": category}
    print("New Leaderboard data: ", data)
    var res = game_center.post_score(data)
    print("Update Leaderboard response: " + str(res))
- The function takes two arguments:
score:intandcategory:String. - First, we check if the
game_centervariable is empty (null). If so, we exit the function. - Next, if authentication hasn’t been done, we authenticate again.
- We prepare the data to update the leaderboard. This data includes the score and the category of the leaderboard.
- Then, we call the plugin’s
post_score()function with the data. This updates the leaderboard. The function returns the result, which we print for debugging purposes.
With update_leaderboard() defined, you can call this function at the appropriate time in your game to reflect the score.
var current_score : int = 0
var highscore : int = 0

func update_highscore(current_score: int):
    if high_score < current_score:
        high_score = current_score
        update_leaderboard(high_score, "highscore")
For instance, in a simple shooting game:
- Declare a variable
current_scoreto increment whenever an enemy is shot. - Also declare
highscoreto store the highest score achieved, which will be reflected on the leaderboard. - Then, consolidate the logic in the
update_highscorefunction, which you can call at game over to handle updating both the high score and the leaderboard.
These specifics will vary based on your game.
Finally, you’d probably want to navigate to the Game Center screen within your game to check the leaderboard. Here’s a function to do just that:
func show_leaderboard():
    if not game_center:
        print("No Game Center plugin")
        return

    if not game_center.is_authenticated():
        print("not authenticated, authenticating again")
        game_center.authenticate()

    var param := {"view": "leaderboards", "leaderboard_name": "highscore"}
    var res = game_center.show_game_center(param)
    print("Show Leaderboard response: ", res)
When a Button node is pressed, you can call this function to transition to the Game Center leaderboard screen.
- The function name is
show_leaderboard(), and it takes no arguments. - We first check if the
game_centervariable is empty (null). If so, we exit the function. - If authentication hasn’t been done, we authenticate again.
- We prepare the parameters for the Game Center screen navigation.
"view"should be set to"leaderboards", and"leaderboard_name"should be set to the name you defined in App Store Connect. - Then, we call the plugin’s
show_game_center()function with the parameters. The function returns the result, which we print for debugging.
Implementing Achievements
Next, let’s code the program related to Achievements. It’s quite similar to Leaderboards, so if you’ve grasped that, you’re good. We’ll keep this example simple too.
func update_achievement(item_name:String, progress:float):
    print("called report_achievement()")
    if not game_center:
        print("No Game Center plugin")
        return

    if not game_center.is_authenticated():
        print("not authenticated, authenticating again")
        game_center.authenticate()

    var data = {"name": item_name, "progress": progress}
    print("New Achievement data: ", data)
    var res = game_center.award_achievement(data)
    print("Update Achievement response: " + str(res))
- The function, for example
update_achievement(), takes two arguments:item_name:Stringandprogress:float. - First, we check if the
game_centervariable is empty (null). If so, we exit the function. - If authentication hasn’t been done, we authenticate again.
- We prepare the data to update the achievement, including the achievement’s name and the progress (in percentage).
- Then, we call the plugin’s
award_achievement()function with the data. This updates the achievement. The function returns the result, which we print for debugging.
Then, for instance, for an achievement that requires reaching a certain play count:
var play_count := 0
var play_count_100 := false

func update_play_count_100():
    if not play_count_100:
        var progress = play_count / 100 * 100.0
        update_achievement("play_count_100", progress)
        if progress == 100.0:
            play_count_100 = true
- Declare a variable
play_countto increment with each play. - Also declare
play_count_100to track whether the achievement has been reached. - Define the
update_play_count_100()function to incrementally update the achievement progress each time it’s called, and if it reaches 100%, mark the achievement as completed.
Achievement implementation should be good with this.
Conclusion
That’s it for implementing Game Center functionality in iOS games with the Game Center plugin. Actually, the official Godot iOS plugin repository’s Readme explains how to implement, but the explanation is a bit limited and the plugin code is a bit complex, so it took me more time to implement than I anticipated. So, I hope this article serves as a helpful supplementary material.
Game Promotion
Finally, let me promote my games that actually use the Game Center plugin.
👹 Slashing Samurai
Test your reflexes and visual acuity! Can you skillfully slice various objects falling from the sky by controlling a samurai? An addictive casual timing game that you can play with simple one-handed controls!
🃏 Lovely Solitaire
When you hear “Solitaire (Klondike),” you know it’s the king of solo card games, but now, the mobile game “Lovely Solitaire” is available on the App Store!
♣️ Quick Hand Poker
When it comes to popular classic casino card games, poker is a standout. However, in the mobile casual game “Quick Hand Poker,” it has been transformed into a puzzle game. The controls are simple—just touch the cards as quickly as possible to form as many poker hands as you can! Available now on the App Store!