This tutorial introduces Path Finding in 2D games. Path finding is a function that determines the shortest possible path from an object to its destination, for example, when moving an object to a certain destination.
Up to Godot 3.4, the Navigation node was used to implement path finding. This was not particularly inconvenient, but the methodology for game development using it was limited and inapplicable in some areas. This time, I would like to introduce an implementation method using Navigation Server, which was added to Godot 3.5. This is a backport from Godot 4, which is currently under active development. This article is intended for users of Godot 3.5 or later. Users of Godot version 3.4 or earlier should take note.
The final project file for this tutorial is available at GitHub repository . You can also check the project directly by downloading the .zip file and importing the “project.godot” file in the “End” folder with the Godot Engine.
Environment
Godot version: 3.5
Computer OS: macOS 11.6.5
Basic Articles
You may also find the following articles useful.
Downloading Godot
Project Manager of Godot
Preparation
Creating a new project
Start Godot Engine and create a new project. You can name your project as you like. If you can’t think of one, let’s call it “2D Path Finding Start”.
Updating project settings
Once the editor appears, we should update project settings for the entire project.
First, set the display size for the game.
- Open the “Project” menu > “Project Settings
Select “Display” > “Window” from the sidebar of the “General” tab. - In the “Size” section, change the values of the following items.
- Width: 512
- Height: 320
- Test Width: 768
- Test Height: 480
- In the “Stretch” section, change the values of the following items
- Mode: 2d
- Aspect: keep
- Switch to the “Input Map” tab and add “move_to” to the action.
- Assign the “left mouse button” to the “move_to” action.

Downloading and importing assets
Next, let’s download assets from KENNEY’s site and use them. The asset pack we will use is called 1-Bit Pack . I can’t help but be thankful for this wonderful free material.
Once downloaded, drag and drop the “colored-transparent_packed.png” file from the “Tilesheet” folder into the editor’s file system dock to import it into your project.
Immediately after importing the file, the image will look blurry, so correct this by following the steps below.
- Make the imported asset file selected in the file system dock.
- Select “Preset” > “2D Pixel” in the import dock.
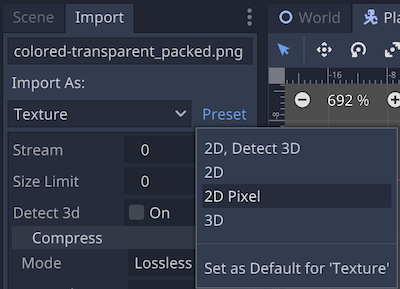
- Click the “Re-import” button at the bottom.

The image should now have the edges characteristic of pixel art. The imported tileset will be used later for tile maps and player character textures.
Creating a World scene
Creating a new World scene
The first step is to create a “World” scene to prepare the game world. 1. Select “Scene” menu > “New Scene”.
- Select “Other Node” in “Generate Root Node”.
- When the root node of the “Node2D” class is generated, rename it to “World”.
- Save the scene. Create a folder and save the scene with the file path “res://Scene/World.tscn”.
Adding and editing a TileMap node
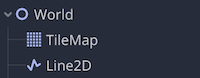
Adding a “TileMap” node to the “World” root node.

In the inspector, apply the “New TileSet” resource to the “TileSet” property of the “TileMap” node.
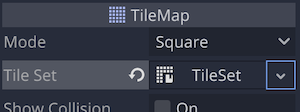
Click on the applied “TileSet” resource to open the TileSet panel at the bottom of the editor.
Add imported KENNEY “res://colored-transparent_packed.png” resource file by dragging it to the left sidebar of the TileSet panel.
Select the added texture sheet and prepare the following three single tiles.
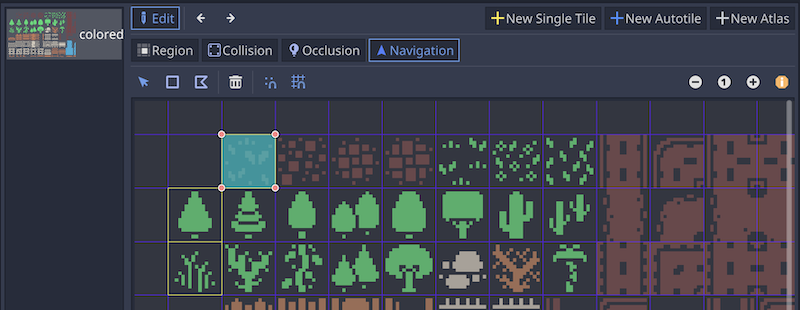
- Tile for the character’s pathway.
*Tiles with this navigation area set are the target of the pathfinding.- Use gravel tiles
- Collision polygon: not required
- Navigation polygon: Needed
- Tiles that characters do not pass through but do not collide with each other.
*Use as a margin so that the character does not get caught by tree tiles with collision geometry when moving along the path.- Use grass texture
- Collision polygons: not needed
- Navigation polygons: not needed
- Tiles that characters cannot pass through and have collision detection.
*Use as impassable obstacles during path finding.- Use tree texture
- Collision polygon: Needed
- Navigation polygons: not required
- Tile for the character’s pathway.
Select “TileMap” in the scene dock and create a tile map on the 2D workspace. Below is a sample. It is OK if the gravel tiles provide some pathways (navigation areas).
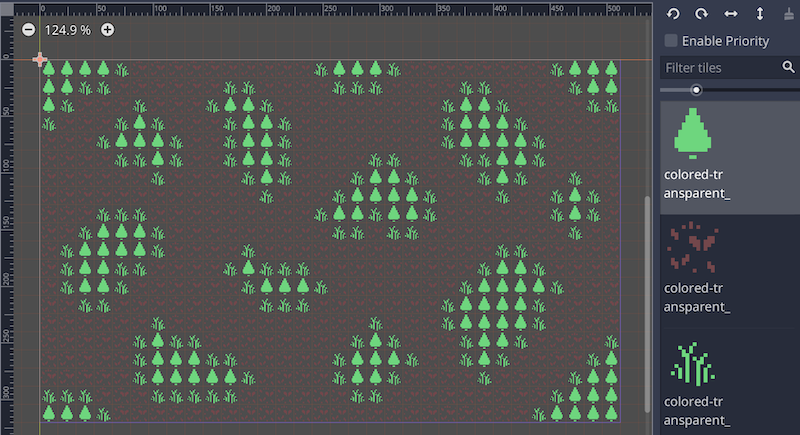
It is important to note, however, that once you place the tree tiles for obstacles, be sure to place the grass tiles for margins around them. Otherwise, the character will try to pass right through the wooden tiles when moving along the path, and will get stuck and not be able to move. This is something I would like to see improved in future Godot updates. I haven’t implemented the character yet, but I’ll show you how it behaves first.
Adding and editing the Line2D node
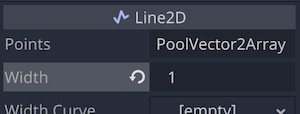
The “Line2D” node is used to make the explored and determined path visually clear.
- Add a “Line2D” node to the “World” root node.
- In the inspector, set the “Width” property of the “Line2D” node to.
Creating a Player scene
From here, we will create a scene for the player character to move along the found path.
Creating a new Player scene
- Select “Scene” menu > “New Scene”.
- Select “Other Node” in “Generate Root Node”.
- When the root node of the “KinematicBody2D” class is created, rename it to “Player”.
- Save the scene. Create a folder and save the scene with the file path “res://Scenes/Player.tscn”.
Adding and editing nodes to the Player scene
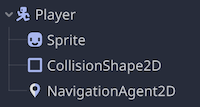
Add nodes to the “Player” root node to make the scene tree look like this.
- Player(KinematicBody2D)
- Sprite
- CollisionShape2D
- NavigationAgent2D
Each node is then edited.
Sprite node
This node is used to apply texture (appearance) to the “Player” scene.
- In the inspector, apply the “res://colored-transparent_packed.png” resource downloaded from KENNEY’s site to the “Texture” property.

- Enable the “Region” > “Enabled” property.
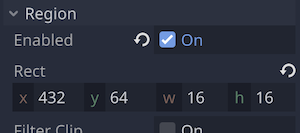
- Open the Texture Region panel at the bottom of the editor and select the region of the player character texture of your choice. For this tutorial, we used a sheriff-like texture.

CollisionShape2D node
This node sets the collision shape for the “Player” root node of the KinematicBody2D class.
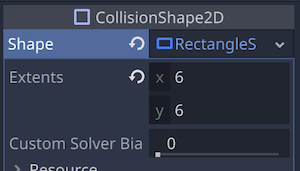
- Apply a new “RectangleShape2D” resource to the “Shape” property in the inspector.
- Set the value of the “Extents” property of the applied “RectangleShape2D” resource to (x: 6, y: 6).
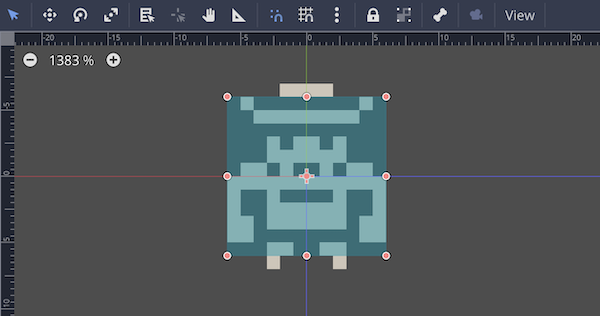
- On the 2D workspace it will look like this.
NavigationAgent2D node
This node was introduced in Godot 3.5 as a backported node from Godot 4. A parent node (in this case, the “Player” node) adding this node to its children will automatically avoid collisions with obstacles and will be able to move by path finding. It seems to be controlled by being registered in the navigation map of the default World2D. For more details, please refer to Godot’s official online documentation.
Godot Docs:
NavigationAgent2D
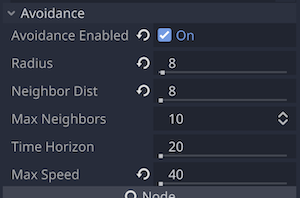
- Check the “Avoidance” > “Avoidance Enabled” property to enable it. This controls collision avoidance with obstacles and enables path finding.
- Set the “Avoidance” > “Radius” property to 8. This property is the size of this agent. We set the radius to 8 px to match the size of the texture on the “Sprite” node.
- Set the “Avoidance” > “Neighbor Dist” property to 8. This property sets the distance at which other agents will be detected. Later we will create other object scenes that will automatically track the Player and add NavigationAgent2D nodes to them as well, but they will not need to be detected until they are right next to the Player, so we set this property to 8 as well as the agent’s.
- Set the “Avoidance” > “Max Speed” property to 40. This is the maximum movement speed of the agents.
Adding an instance of the Player scene to the World scene
Add an instance node of the “Player.tscn” scene created here to the “World” scene. It is OK if the scene dock of the “World” scene looks like the following.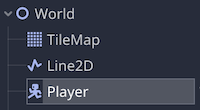
Attaching and editing scripts to the Player node
After returning to the “Player” scene, attach a script to the “Player” root node and write the code. Create a script with the file path “res://Scripts/Player.gd”. When the script editor opens, write the following code.
###Player.gd###
extends KinematicBody2D

# Player speed
export (float) var speed = 40

# Refer to the Line2D node in the World scene
onready var line: Line2D = get_node("... /Line2D")
# Refer to the NavigationAgent2D node
onready var nav_agent = $NavigationAgent2D

# Built-in function called when a node is loaded into the scene tree
func _ready():
    # Set the current location as a temporary destination by NavigationAgent2D
	nav_agent.set_target_location(global_position)


# Built-in physics process function called every frame
func _physics_process(delta):
    # If the last position of the found path has not been reached
	if not nav_agent.is_navigation_finished():
        # Get the next navigable position without obstacles
		var next_loc = nav_agent.get_next_location()
        # Get the current Player location
		var current_pos = global_position
        # Calculate velocity from direction and speed for next possible location
		var velocity = current_pos.direction_to(next_loc) * speed
        # Pass velocity to NavigationAgent2D's collision avoidance algorithm
        # send velocity_computed signal as soon as velocity adjustment is complete
		nav_agent.set_velocity(velocity)
    # When the input map action move_to (left mouse button) is pressed
	if Input.is_action_pressed("move_to"):
        # call a method to start path finding
		find_path() # Define after this

# Method to start path finding
func find_path():
    # Set the current mouse position as the next destination by NavigationAgent2D
	nav_agent.set_target_location(get_global_mouse_position())
    # Get the next possible location to move to without obstacles
	nav_agent.get_next_location()
    # Pass the information of the path generated by NavigationAgent2D to the path of Line2D in the World scene
    # Both data types are PoolVector2Array, so they can be passed as is
	line.points = nav_agent.get_nav_path()
Now connect three different signals of the “NavigationAgent2D” node to this script.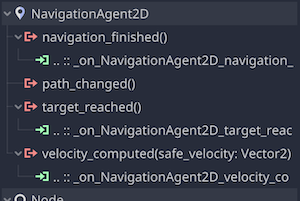
The first one is the “velocity_computed” signal. This signal is sent when NavigationAgent2D has completed adjusting its velocity to avoid collisions with surrounding objects.
The second is the “target_reached” signal. This signal is sent out when the next moveable position on the path to the final destination is reached.
The third signal is “navigation_finished. This signal is sent out when the final destination on the route is reached.
After connecting each signal to the script, write the necessary code in the generated method. The code is as follows.
###Player.gd###
# Called with a signal that is sent out when NavigationAgent2D has finished adjusting its velocity
func _on_NavigationAgent2D_velocity_computed(safe_velocity):
    # Apply the adjusted velocity to the Player's movement
	move_and_slide(safe_velocity).

# Called with a signal that is sent when the NavigationAgent2D reaches its next moveable position.
func _on_NavigationAgent2D_target_reached():
    # On the path of a Line2D node in the World scene...
    # reflect the updated path of the NavigationAgent2D
	line.points = nav_agent.get_nav_path()

# Called with a signal that is sent out when NavigationAgent2D reaches the last destination in its path
func _on_NavigationAgent2D_navigation_finished():
    # Reset the points of the path of the Line2D node in the World scene to 0
	line.points.resize(0)
This completes the editing of the “Player.gd” script. At this point, try running the project once. If you are running the project for the first time, select “res://Scenes/World.tscn” as the main scene.
Let’s click on the tile map appropriately and check if “Player” moves along the path search without any problem.
Creating an Animal scene
In the “Player” scene, we implemented path finding using the mouse position as the destination. From now on, we will implement path finding for another object that moves with the moving “Player” as its destination. However, there is no need to worry, since most of the work is the same.
Let’s make multiple animal objects gather around the “Player” instance object we just created. We will now create an “Animal” scene for the animal objects.
Creating a new Animal scene
- Select “Scene” menu > “New Scene”.
- Select “Other Node” in “Create Root Node”.
- When the root node of the “KinematicBody2D” class is created, rename it to “Animal”.
- Save the scene. Create a folder and save the scene with the file path “res://Scenes/Animal.tscn”.
Adding and editing nodes in the Animal scene
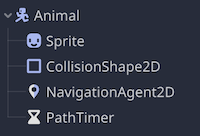
Add some nodes to the “Animal” root node and make the scene tree as follows.
- Animal(KinematicBody2D)
- Sprite
- CollisionShape2D
- NavigationAgent2D
- PathTimer(Timer)
Then edit each node.
Sprite node
This node is used to give texture (appearance) to the “Animal” scene.
- In the inspector, apply the “res://colored-transparent_packed.png” resource downloaded from the KENNEY website to the “Texture” property.
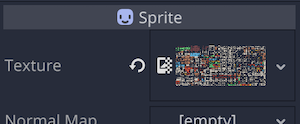
- Enable the “Region” > “Enabled” property.
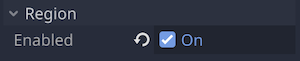
- Open the texture region panel at the bottom of the editor and select a region for the six animal textures.
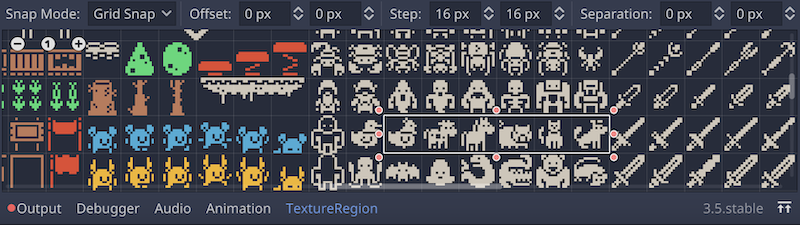
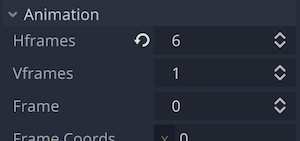
- Set the value of the “Animation” > “Hframes” property to 6. Since the texture area selected earlier contains 6 types of animals, the value is set to be 1 frame for each type of animal. The default frame is set to 0 (first frame) in the “Frame” property.
CollisionShape2D node
This node sets the collision shape for the “Animal” root node of the KinematicBody2D class.
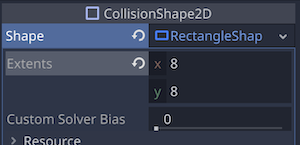
- Apply the “New RectangleShape2D” resource to the “Shape” property in the inspector.
- Set the value of the “Extents” property of the applied “RectangleShape2D” resource to (x: 8, y: 8).
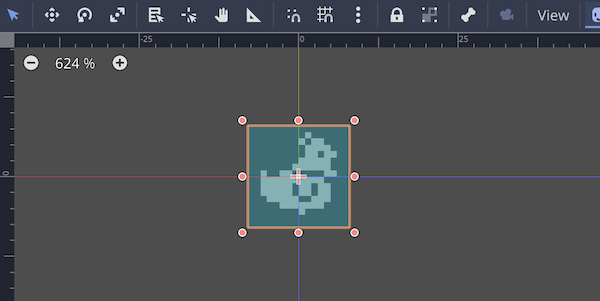
- On the 2D workspace it will look like this.
NavigationAgent2D node
In the “Animal” scene, as in the “Player” scene, this node is used to avoid collisions with obstacles and to enable movement by path finding.
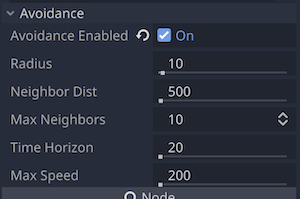
- Enable the “Avoidance” > “Avoidance Enabled” property.
- Leave the “Avoidance” > “Radius” property at the default value of 10. The size of the texture is slightly larger than the size of the Sprite node’s texture, so that the animals are slightly spaced apart.
- The “Avoidance” > “Neighbor Dist” property was also left at the default value of 500. Since the width of the display size is set to 512 px, setting it to 500 will allow other agents to be detected from one end of the display to the other and avoid collisions. The goal is to reduce the number of instances of the “Animal” scene that will crowd around the “Player” instance and thus reduce the possibility of being stuck in the scene.
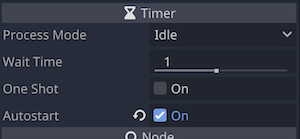
PathTimer(Timer) Node
This node is used to periodically update the position of the moving destination (instance node of “Player”).
- The “Wait Time” property is left at the default value of 1.
- The “One Shot” property should also be left at the default value of 1 and disabled. This will time out repeatedly every second.
- Enable the “Autostart” property. The timer will now start automatically when this node is loaded into the scene tree.
Attaching and editing scripts to the “Animal” node
From here, we will attach a script to the “Animal” root node and write code to control the “Animal” scene. Create a script with the file path “res://Scripts/Animal.gd”. When the script editor opens, code as follows.
###Animal.gd###
extends KinematicBody2D

# Speed of Animal
var speed = 30
# Variable to assign the object that will be the destination of the route
var target

# Reference to the Sprite node
onready var sprite = $Sprite
# Reference to NavigationAgent2D
onready var nav_agent = $NavigationAgent2D

# Same as Player.gd below
func _ready():
	nav_agent.set_target_location(global_position)


func _physics_process(_delta):
	if not nav_agent.is_navigation_finished():
		var current_pos = global_position
		var next_loc = nav_agent.get_next_location()
		var velocity = current_pos.direction_to(next_loc) * speed
		nav_agent.set_velocity(velocity)
        # If the x-coordinate of the destination object is smaller than the x-coordinate of the animal node
        # flip the Texture image of the Sprite node
		sprite.flip_h = target.global_position.x < global_position.x
Two signals must then be connected to the script.
The first one is to connect the “velocity_computed” signal of the “NavigationAgent2D” node as in the “Player” scene.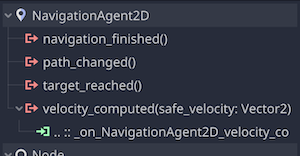
Once connected, write a move_and_slide method in the generated _on_NavigationAgent2D_velocity_computed method to control the movement of the “Animal” node.
###Animal.gd###
# Called with a signal that is sent out when NavigationAgent2D has finished adjusting its velocity
func _on_NavigationAgent2D_velocity_computed(safe_velocity):
    # Apply the adjusted velocity to the Player's movement
	move_and_slide(safe_velocity)
The next step is to connect the “timeout” signal of the “PathTimer” node to the script.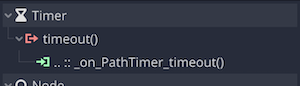
Once connected, within the generated method _on_PathTimer_timeout, describe the set_target_location method of the “NavigationAgent2D” node to set the location of the destination object (in this case “Player”) as the destination during path finding. Now, at the time of timeout every second, the position of the latest “Player” instance node is acquired and the path finding is performed with that as the destination.
###Animal.gd###
func _on_PathTimer_timeout():
	nav_agent.set_target_location(target.global_position)
The “Animal.gd” script is now complete.
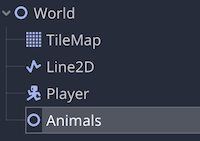
Adding an Animals node to the “World” scene
- Add a node of class Node2D to the “World” scene as a container for multiple instances of the “Animals” scene and rename it to “Animals”. Adding instances of “Animal” will be done by script after this.
Attach a script to the “World” node and edit it
Attach a script to the “World” root node and edit it, adding multiple instances of “Animal”. Save the script with the file path as “res://Scripts/World.gd” and when the script editor opens, write the code as follows.
###World.gd###
extends Node2D

# Reference to preloaded Animal scene file
const animal_scn = preload("res://Scenes/Animal.tscn")

# Number of Animal instances
export (int) var head_count = 12

# Reference to TileMap node
onready var tile_map = $TileMap
# Reference to the Player node
onready var player = $Player
# Reference the Animals(Node2D) node
onready var animals = $Animals


func _ready():
    # Randomize seed for random number generation function
	randomize().
    # Get an array of ID 9 tiles on the TileMap
    # IDs can be found by clicking the (i) icon in the tileset panel edit screen
	var cells = tile_map.get_used_cells_by_id(9)
    # Loop for the number of Animal instances
	for i in head_count :
        # Get random index within the number of tiles with ID 9
		var random_index = randi() % cells.size()
        # Get a tile from the ID 9 tiles that fits the random value
		var spawn_tile = cells.pop_at(random_index)
        # loop if the tile has already been spawned from the array and the array is not yet empty
		while spawn_tile == null and not cells.empty():
            # Generate a random value within the range of the number of ID9 liles again
			random_index = randi() % cells.size()
            # Spawn a tile from the ID9 tiles again that fits the random value
			spawn_tile = cells.pop_at(random_index)
        # Place an Animal instance on the acquired tile...
        # by calling a method to create an Animal instance
		spawn_animal(spawn_tile)

# method to spawn Animal instance
func spawn_animal(spawn_tile):
    # Get the position of the tile passed as argument, shifted by (8, 8) to the x,y coordinates of the tile
	var spawn_pos = tile_map.map_to_world(spawn_tile, true) + Vector2(8, 8)
    # Create an instance of the Animal scene
	var animal = animal_scn.instance()
    # Position the Animal instance on the tile passed as argument
	animal.position = spawn_pos
    # Assign and reference the Player node to the destination property of the Animal instance
	animal.target = player.global_position
    # Randomly determine the texture of the Sprite node of the Animal instance
	animal.get_node("Sprite").frame = randi() % animal.get_node("Sprite").hframes
    # Make the Animal instance a child of the Animals node
	animals.add_child(animal)
The “World.gd” script is now complete. Let’s run the project and see how multiple instances of “Animal” approach “Player”.
The number of head_count properties defined in the script can be easily edited in the inspector, since it comes with the export keyword. I increased the number of “Animal” instances to 100 as a test, but it got stuck at the end. If “Animal” were a zombie, it would be a hellish scene.
Sample game
I have prepared a sample game that further brushes up the project created in this tutorial.
The project file of the sample game is located in GitHub repository
, so please download the .zip file from there. You can check it by importing the “project.godot” file in the “Sample” folder with the Godot Engine.
Game Rules:
- Left mouse click to move to the mouse cursor position
- Spacebar to shoot the gun in the direction of the mouse cursor.
- When you run out of bullets, reload 12 bullets after reloading animation.
- When you hit an enemy, you lose a heart.
- When you run out of all 5 hearts, the game is over.
- The darker the color of an enemy, the more lives it has and the slower its speed is. The lighter the color, the less lives it has and the faster its speed is.
- The player’s score is the number of jewels that dropped when an enemy is defeated.
Conclusion
In this tutorial, we implemented the new Navigation Server added in Godot 3.5.
For a simple 2D route search like this one, it was relatively easy to implement using NavigationAgent2D, although there are still some itchy points, such as the problem of getting caught in a corner when using a TileMap without a margin tile. However, we hope that this will be improved in future updates.
Let me summarize the key points of this project.
- When using TileMap, be sure to set navigation to movable tiles.
- When using TileMap, make a margin with tiles that are set only in the area so that they do not get caught in corners.
- You can also define a navigation area using the NavigationPolygonInstance node, which we did not use in this case.
- Adding a “NavigationAgent2D” node to the child of the object you want to move.
- When controlling path finding in scripts, write the code with the following order in mind: set the final destination, obtain the next possible moving position, adjust the speed to avoid collision, and move at the adjusted speed.
References
- Official Article - Navigation Server for Godot 4.0
- Official Article - Godot 3.5: Can't stop won't stop
- Godot Doc - NavigationAgent2D
- YouTube - Godot 3.5 | NavigationAgent2D
- YouTube - Godot 3.5 is Out, and it's SICK! Real-time pathfinding, new tween animations, and more
- GitHub - godotengine/godot - issue #60546