This article describes an implementation of an animated state machine for a 2D game. A state machine controls the transition of an object from one state to another.
There are several restrictions on state transitions, such as when an object can only transition from one state to a limited number of states, or when an object can only transition to the next state after the current animation ends. For example, “idle” and “run” can transition immediately in both directions, but “idle” to “attack” can transition immediately, but “attack” to “run” cannot, and “attack” to “idle” can transition only after the “attack” animation ends. The “attack” to “idle” transition occurs only after the “attack” animation is over.
If all of these controls were coded in script, the code would tend to be rather long and complex. On the other hand, Godot’s “AnimationTree” node can be used to reduce the amount of script code and improve readability. In this article, we will show you how to implement a state machine using the “AnimationTree” node.
Environment
Godot version: 3.5.1
Computer OS: macOS 12.6
Basic Articles
You may also find the following articles useful.
Downloading Godot
Project Manager of Godot3
Preparation
Project Settings
After starting a new project, do some preliminary project settings.
The window size is set as follows.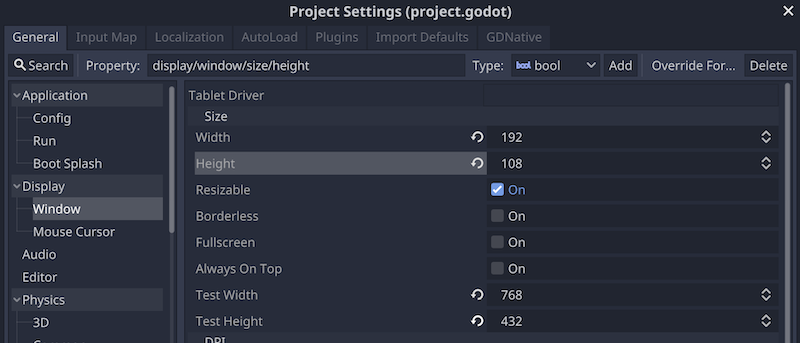
Added the following actions to the input map for the player character’s movement and attacks.
Download Assets
I have downloaded the asset pack from the following link.
Use the three sprite sheets “player.png”, “slime.png” and “objects.png” in the downloaded folder. I can’t help but be thankful for this wonderful asset.
The three sprite sheets (.png files) are added to the project by dragging and dropping them into Godot’s file system.
If the added image appears blurry (it will by default), select the imported file, select “Presets” > “2D Pixel” from the “Import” tab, and click the “Reimport” button. The image will now be displayed with the edges characteristic of dot images.
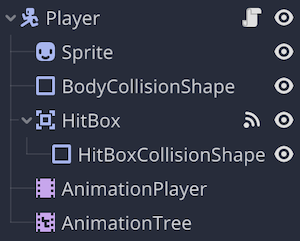
Create a Player scene
Create a “Player” scene for the player character. The scene tree will look like this:
- Player (KinematicBody2D)
- Sprite
- BodyCollisionShape (CollisionShape2D)
- HitBox (Area2D)
- HitBoxCollisionShape (CollisionShape2D)
- AnimationPlayer
- AnimationTree
Edit a node in the Player scene
Sprite node
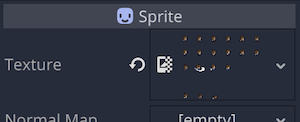
- Apply the previously imported resource “player.png” to the “Texture” property in the inspector.
Set the value of the “Animation” > “Hframes” property to 6 and the “Vframes” property to 5. This is because the applied sprite sheet consists of 6 columns horizontally and 5 rows vertically. Since this is a free version of the sprite sheet, the fourth row is missing, so don’t worry about it. Later, we will create an animation by changing the number of frames in the “AnimationPlayer” node.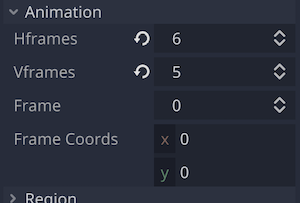

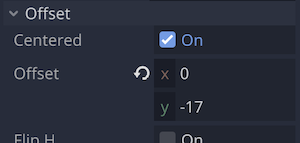
- Change “Offset” > “Offset” property to (0, -17). The feet of the player character’s texture will now be at the coordinates (0, 0). This is done so that when the player character’s feet overlap with other objects on the game screen, the y-coordinates of each object are compared, and the object in front (with the larger y-coordinate) is displayed in the foreground.
BodyCollisionShape (CollisionShape2D) node
In the inspector, the “CircleShape2D” resource was applied to the “Shape” property, and the size and position were adjusted as follows.
HitBox (Area2D) node
This node is for the Hit Box for melee attacks. There is no need to edit this node. The implementation of melee attacks is explained in detail in the following article.
HitBoxCollisionShape (CollisionShape2D) node
The “RectangleShape2D” resource is applied to the “Shape” property. The size and position of the collision shape of the Hit Box will be changed in the animation of the “AnimationPlayer” node, so we will leave them as they are and set them when creating the animation. The “Disabled” property is also changed in the attack animation, but since the Hit Box needs to be disabled except during the attack, we leave it turned on.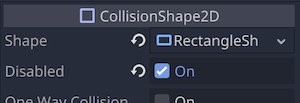
AnimationPlayer node
Confirm that the “Root Node” is set to the “Player” node in the inspector.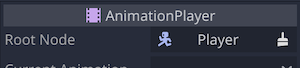
Create animations
In the animation panel, create the following six types of animations.
- idle
Just change the “Frame” property of the “Sprite” node. Looping is on.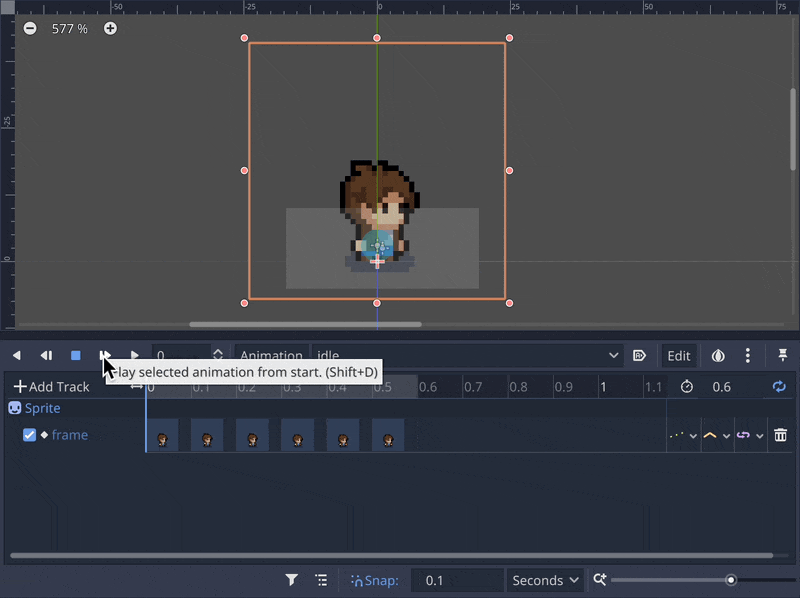
- run
Just change the “Frame” property of the “Sprite” node. Looping is on.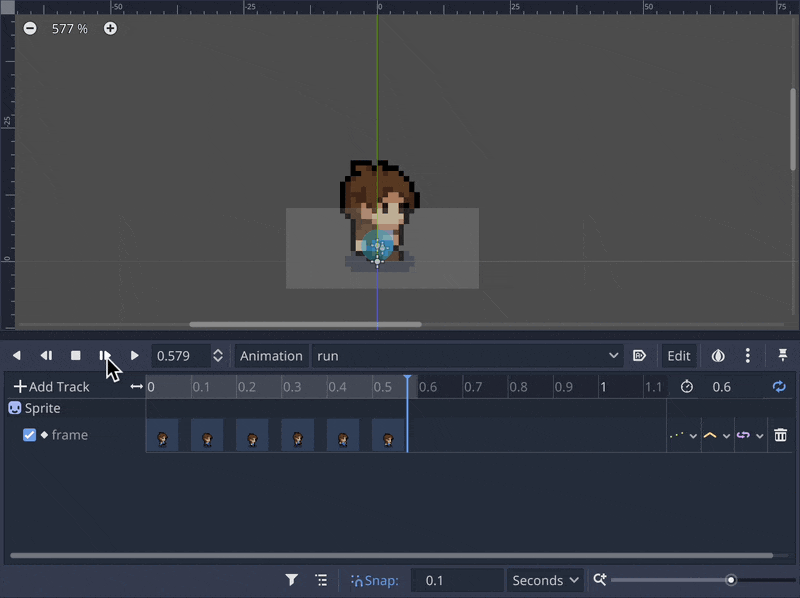
- attack1
This is the first animation for the attack. In addition to changing the “Frame” property of the “Sprite” node, the “Disabled” properties of the “BodyCollisionShape” and “HitBoxCollisionShape” are turned on and off. Looping is off. At this timing, the position and size of the “HitBoxCollisionShape” collision shape should be set to match the sprite’s sword trajectory.
- attack2
This is the second animation the attack. This is played during the first animation to make it look as if the player character is attacking continuously. It is just “attack1” played backwards. Looping is turned off.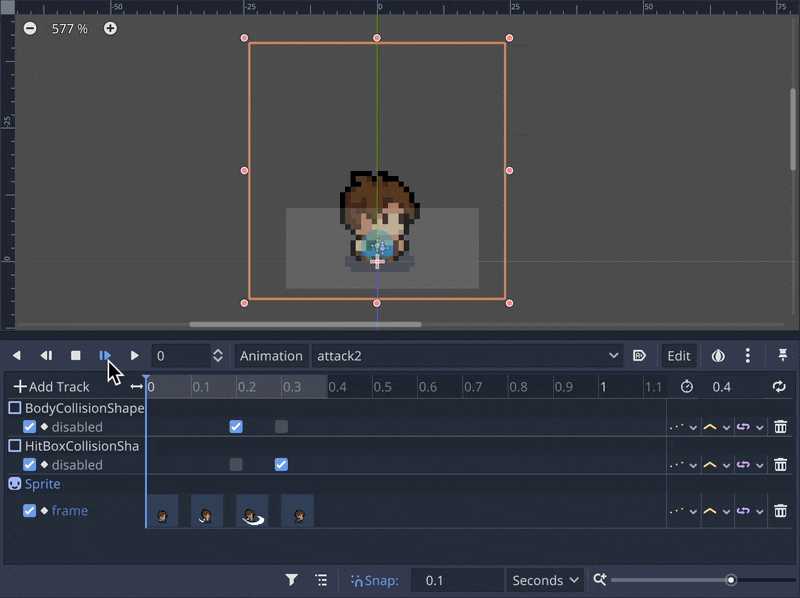
- hurt
This is the animation when the player character takes damage. The sprite sheet does not have a texture when it is damaged, so it is represented by blinking colors. The “Modulate” property of the “Sprite” node is switched between white and red (translucent) multiple times. Two “Call Method Tracks” were added by clicking “+Add Track” in the upper left corner of the panel. One is to call theset_physics_process()method at the end of the animation. In the inspector, turn on “Args” > “0” > “Value”. This means that the argument of this method is passedtrue. The loop is turned off. The other method will be defined later in the script and then added (here is the state after the addition). Thedie_on_hurt_anim()method is called. This will be the method that will transition to the “die” animation when the life reaches 0, and will be explained again when scripting.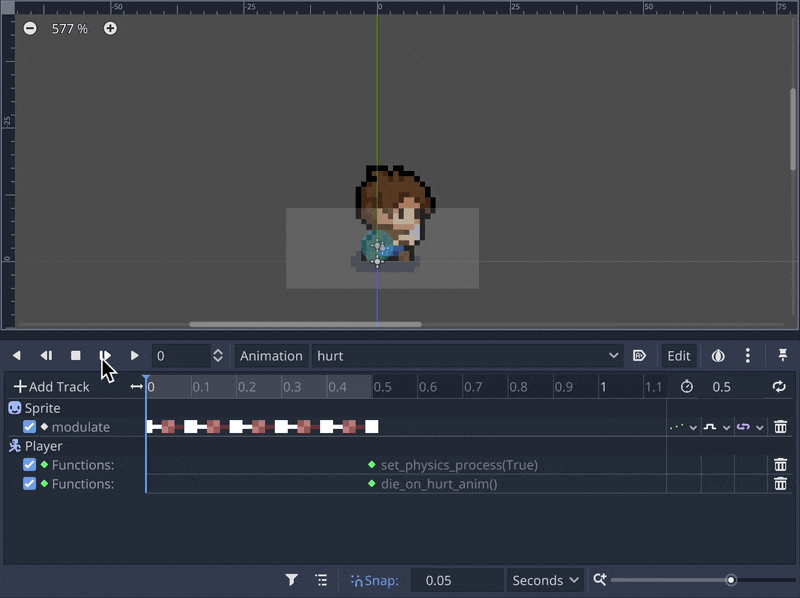
- die
Animation when dead. Just change the “Frame” property of the “Sprite” node. Looping is off.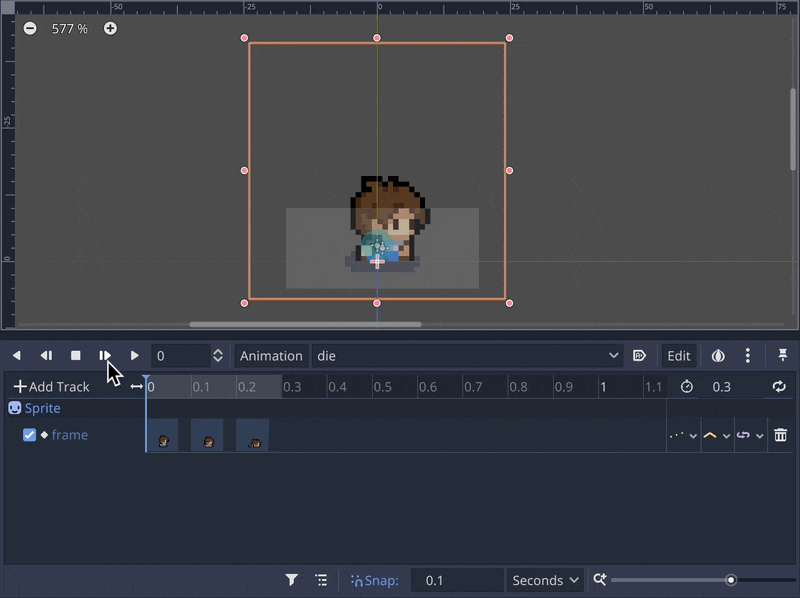
The naming convention “attack1” and “attack2” is based on the following video.
YouTube - Name Files Logically
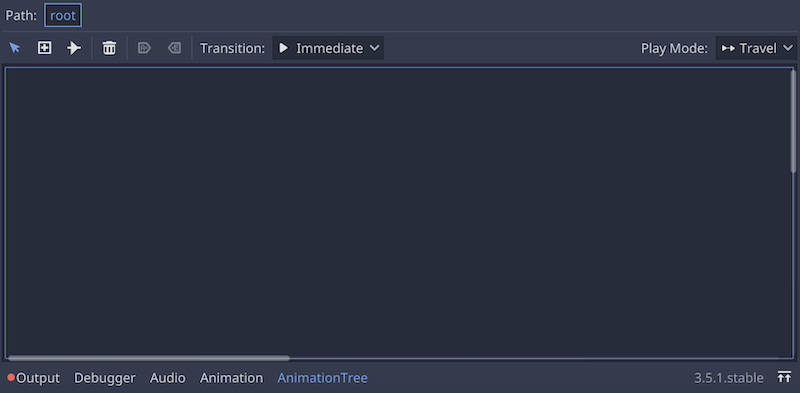
AnimationTree node
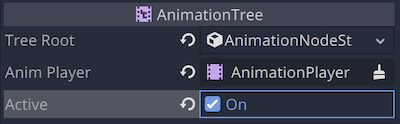
Using this node, we will create a state machine to control the animation prepared by “AnimationPlayer”. 1. In the inspector, select “New AnimationNodeStateMachine” for the “Tree Root” property. This is a setting to enable state management of animations.
- Make sure that the “AnimationPlayer” node is selected in the “Anim Player” property.
- Turn on the “Active” property. If it is not turned on, this node will not function. However, when adding or editing animations on the “AnimationPlayer” node, you may need to turn it off to stop the animation from playing.
Create a State Machine
From this point on, we will work on the animation panel. We will compose the animation tree that will carry the state machine.
- Open the Animation Tree panel.
- Right-click in the panel with the Select/Move tool
 or use the node creation tool and click in the panel,
 then you can select an animation you want to add as a node from the animations created in “AnimationPlayer”.
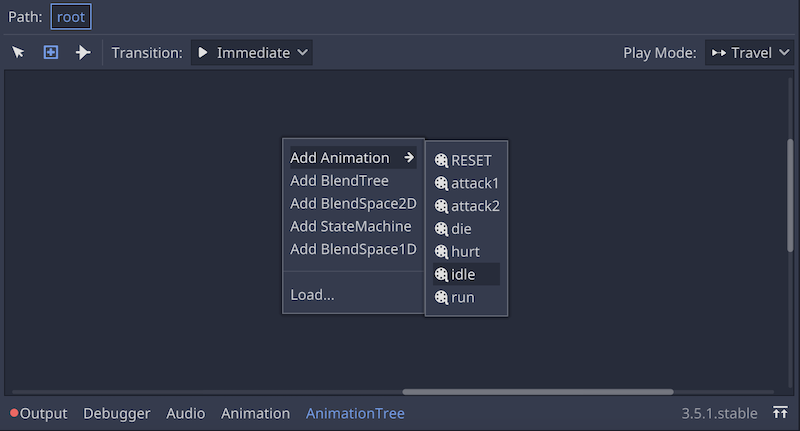
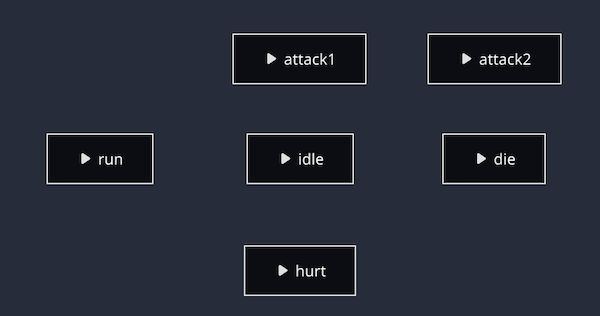
- At first, all the animations created by “AnimationPlayer” are added as nodes in the animation tree. In the screenshot below, the nodes are arranged in an orderly fashion, but in the actual creation of the animation tree, the nodes will be connected to each other, and the arrangement will be adjusted each time to make it easier to see.
- Then, in the Select/Move tool, hold down the Shift key and press or in the Node Connection tool, press
 node to node by dragging.
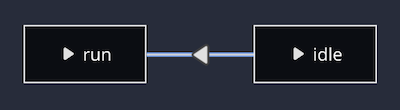
- If you look at the inspector with the connected arrow selected, you will see that it is a resource called “AnimationNodeStateMachineTransition”. By changing the “Switch Mode” property of this resource from the default “Immediate” to “AtEnd,” it is possible to transition to the next node’s animation after the node’s animation ends. At this time and in the panel, the arrows will be displayed with lines.

 In addition, if the “Auto Advance” property is turned on, the transition can be made automatically without being controlled by a script. In this case, the arrow will be green.
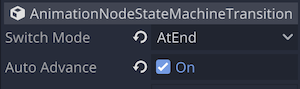
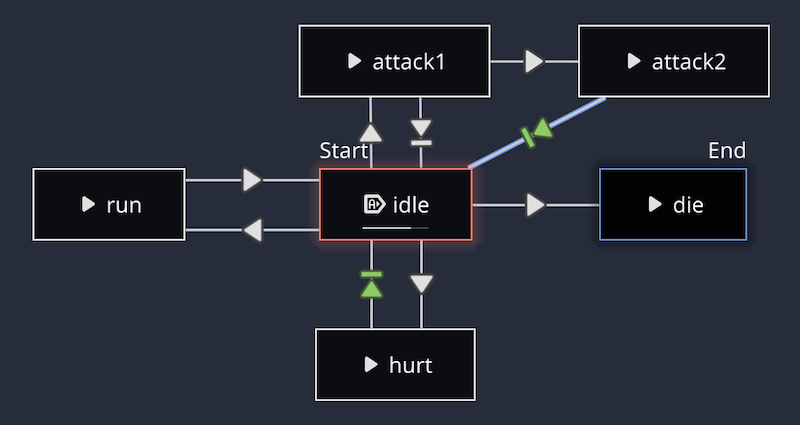
 For example, when the player character takes damage from an enemy, we want to immediately switch the animation from “idle” to “hurt”, but automatically transition to “idle” when the “hurt” animation ends. In this case, the following is used.
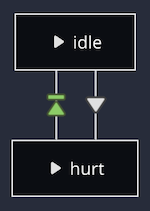
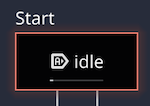
- We want the first animation at the beginning of the game to play automatically, so select the “idle” animation node and enable autoplay.

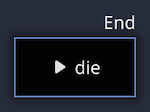
 Similarly, the node for the “die” animation when the player character dies should be selected and set as the last node.
- The final configuration was as follows. This time, the attack is not allowed while moving.
Attach a script to the Player node
Attach the script to the “Player” node and edit as follows:
###Player.gd###
extends KinematicBody2D

# Life
var life: int = 3
# Speed
var speed := 80.0
# Velocity
var velocity: Vector2

# Referencing a Sprite node
onready var sprite = $Sprite
# Parameters > Playback property of the AnimationTree node
# i.e. AnimationNodeStateMachinePlayback resource
onready var state_machine = $AnimationTree.get("parameters/playback")


func _physics_process(_delta):
	get_input()
	velocity = move_and_slide(velocity)

# Methods for player input
func get_input():
    # Get the current state
	var current_state = state_machine.get_current_node()

    # Input for attack
	if Input.is_action_just_pressed("attack"):
        # If current_state is not attack1, move to attack1
		if current_state ! = "attack1":
			state_machine.travel("attack1")
        # If current_state is attack1, move to attack2
		else:
			state_machine.travel("attack2")
        # If an attack is entered, no movement input is accepted and the operation ends.
		return

    # Input of movement
	velocity = Vector2()
	if Input.is_action_pressed("right"):
		velocity.x += 1
		sprite.flip_h = false
	if Input.is_action_pressed("left"):
		velocity.x -= 1
		sprite.flip_h = true
	if Input.is_action_pressed("down"):
		velocity.y += 1
	if Input.is_action_pressed("up"):
		velocity.y -= 1
	velocity = velocity.normalized() * speed
    # If velocity length is 0, transition the state to idle
	if velocity.length() == 0:
		state_machine.travel("idle")
    # If velocity length is greater than 0, transition the state to run
	if velocity.length() > 0:
		state_machine.travel("run")


# Methods called when a player is damaged
func hurt():
    # Life is reduced by 1
	life -= 1
    # Stop physics process and stop accepting input
	set_physics_process(false)
    # Transition state to hurt
	state_machine.travel("hurt")


# Method called at the end of the hurt animation
func die_on_hurt_anim():
    # If life is greater than 0, do nothing and exit
	if life > 0: return
    # Transition the state to die
	state_machine.travel("die")
    # Stop the physical process and stop accepting input
	set_physics_process(false)
As mentioned earlier, the method die_on_hurt_anim must be called within the “hurt” animation. At this point, you should go back to the Animation Panel and edit the `hurt’ animation in the “AnimationPlayer” node.
The “AnimationNodeStateMachinePlayback” resource class, which is the value of the “AnimationTree” node’s “Parameters” > “Playback” property, has a method called get_current_node that can be called from the current node. Calling this method will get the current animation node. This is useful when you want to make an if statement conditional on the current node.
The travel method, also a built-in function of this class, can be used to control the animation transition by passing the name of the animation node to be transitioned as a string argument. Of course, it is necessary to set up the transition on the animation tree (connected by arrows).
Connect the “body_entered” signal of the “HitBox (Area2D)” node at the end of the script and edit the generated method as follows:
###Player.gd###
func _on_HitBox_body_entered(body):
    # Call the hurt method of the body object that was hit by the sword
	body.hurt()
Operation check
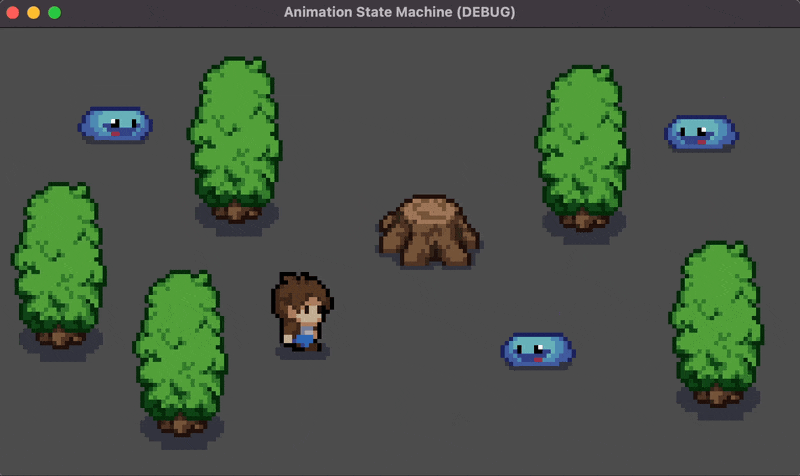
This time, a “Tree” scene and a “Slime” scene were created separately for operation checks. Both scenes can inflict damage by colliding with the “HitBox” in the “Player” scene. The “Slime” scene also has a “HitBox” node, and when the “Player” hits the “Slime”, the player side takes damage and its life is reduced by one. The life property of the “Player” is set to 3, so that the player will die after hitting Slime three times.
We prepared a “World” scene and added instances of the “Player,” “Tree,” and “Slime” scenes. To check the operation, set the “World” scene as the main scene and run the project.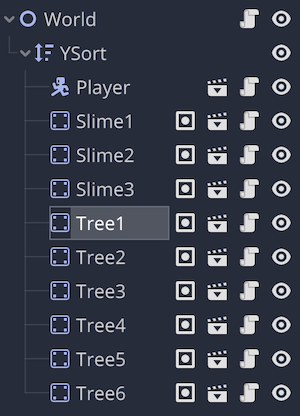
You can see how the state machine smoothly transitions the animation according to the situation.
Conclusion
In this article, we explained how to use a state machine to transition the animation (state) of the player character. Let’s look back at the key points of our work.
- Identify the states to be used in the game first.
- Create an animation for each state using “AnimationPlayer”
- Create a state machine with “AnimationTree”
- Control animation transitions with a script.
In fact, if you have a large number of animations, the nodes and the lines connecting them in the animation tree panel may become cluttered and difficult to understand visually. In such cases, it is a good idea to write them down on a piece of paper with a pen first to organize them in your mind.
Of course, you can also create a state machine with a script instead of relying on the “AnimationTree” node, so if you are not comfortable with editing the animation tree panel, you can try that.
References
- Godot Docs - Introduction to the animation features
- Godot Docs - Using AnimationTree
- Godot Docs - AnimationNodeStateMachinePlayback
- KidsCanCode - CONTROLLING ANIMATION STATES
- YouTube - Godot Recipes: Animation States
- YouTube - Make an Action RPG in Godot 3.2 (P9 | Attacking Animation + State Machines)
- YouTube - Name Files Logically
- itch.io - mystic woods