
This article is a tutorial on how to implement grid-based path finding in 2D games using the AStar algorithm. For 2D pathfinding that is not grid-based, please refer to the article 2D Path Finding in Godot3 . I hope you will choose the article that best suits the game you want to make.
The final project file in this tutorial is located in the GitHub repository . After downloading and extracting the .zip file, you can import the “project.godot” file into the Godot Engine to see the project directly.
Translated with www.DeepL.com/Translator (free version)
Environment
Godot version: 3.5
Computer OS: macOS 11.6.5
Basic Articles
You may also find the following articles useful.
Downloading Godot
Project Manager of Godot
About AStar
In this article, we will implement grid-based routing using a search algorithm called AStar. It is useful when you want to automatically move objects along a grid from the current location to the destination. For example, this method is ideal for puzzle games where you move pieces on the board, or strategy simulation games where you move characters of both sides on the board to fight each other.
What is AStar?
AStar, also known as A*, is an algorithm that searches for the shortest path from the start point to the goal point while avoiding obstacles. In the case of Godot engine, you do not have to code the algorithm from scratch by using the AStar class. We will use it in this tutorial.
Wikipedia - A*
Godot Docs - AStar2D
Create a project
First, create a new project. This time, name the project “2D Grid Based Path Finding”.
Project Settings
The following settings are made in the “Project” menu > “Project Settings”.
- General" tab
- Display > Window
- Size section
- Width: 1024
- Height: 576
- Stretch section
- Mode: 2d
- Aspect: keep
- Size section
- Display > Window
- Input Map" tab 1.
- add “move_to” action
- assign “left mouse button” to “move_to” action

Import assets
This time I used an asset pack called Board Game Icons from KENNEY’s site. I can’t help but be thankful for this wonderful free material.
After downloading, drag and drop the following files from the “/kenney_boardgameicons/PNG/Default (64px)” folder into the file system dock of the Godot editor to import them into your project.
- character.png
- d3.png
- structure_wall.png
Create the Game scene
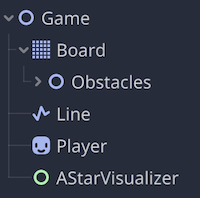
First, create the “Game” scene that will be the main part of the project. Select “Node2D” as the root node, add the necessary nodes to it, rename them, and create a scene tree as shown below.
- Game (Node2D)
- Board (TileMap)
- Obstacles (Node2D) *We will add a child node to this node later.
- Line (Line2D)
- Player (Sprite)
- AStarVisualizer (Control)
- Board (TileMap)
Edit a node
Board (TileMap) node
To edit the “Board” node as the board on which the player’s pieces move in the game:
- Select the “Board” node and apply the “New TileSet” resource to the “Tile Set” property in the inspector.
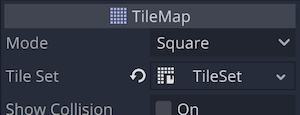
- Click on the “TileSet” applied in the inspector to open the Tile Set panel.
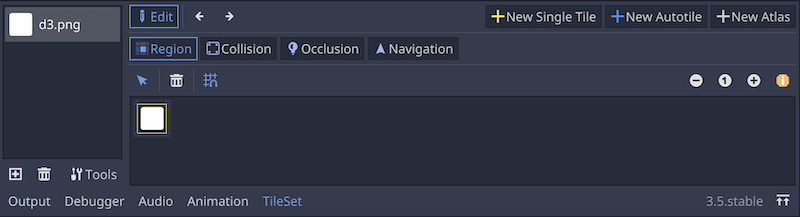
- Drag and drop the previously imported “d3.png” from the file system dock to the sidebar of the TileSet panel to add it as a texture for the tileset.
- Select the added texture and add it as “New Single Tile” specifying its “area”.
- In the inspector, change the color of the tiles to the desired color using the “Modulate” property.

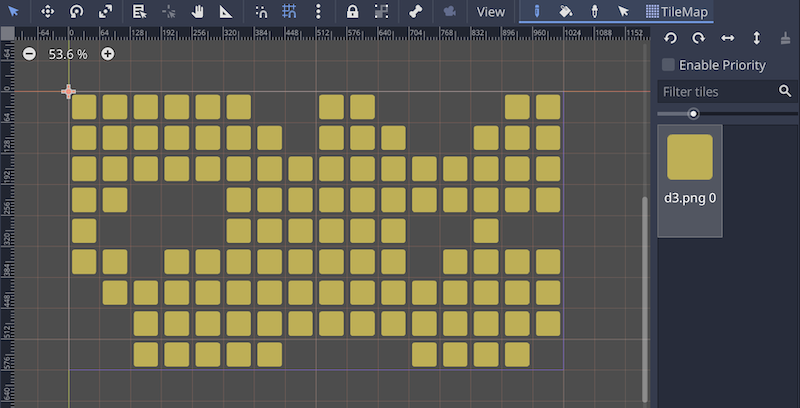
- Select the “Board” node in the scene dock and create a tile map on the 2D workspace, paying attention to the following points
- Create a tile map within the window size of the game.
- The tiles to be placed should be used as movable areas for the player node.
- The tiles must be placed at the top-left grid coordinate (0, 0), because the player node will be placed there later.
Obstacles (Node2D) node
The “Obstacles” node is used as a container (parent node) for multiple obstacle nodes to be placed on the tile map. Therefore, this node itself does not need to be edited.
Create an Obstacle Scene
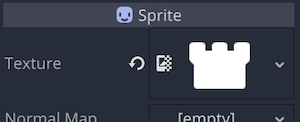
Create a scene of an obstacle to be placed on the tile map. 1. Select “Sprite” as the root node and rename it to “Obstacle”.
- Drag and drop “structure_wall.png” from the file system dock to the “Texture” property in the inspector and apply the resource.
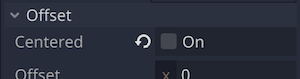
- Turn off the “Offset” > “Centered” property.
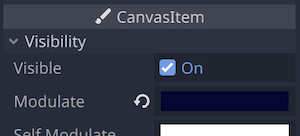
- Change the color with the “Modulate” property. Change the color to a color that is easily visible when the Obstacle node is placed on top of the tiles of the “Board (TileMap)” node prepared earlier.
Adding Obstacle scene instances to the Obstacles node
Return to the “Game” scene and add 10 instance nodes of the “Obstacle” scene you created to the “Obstacles” node and place them at appropriate locations on the tile map. However, be careful not to place them at the grid coordinates (0, 0), since the player’s pieces will be placed there.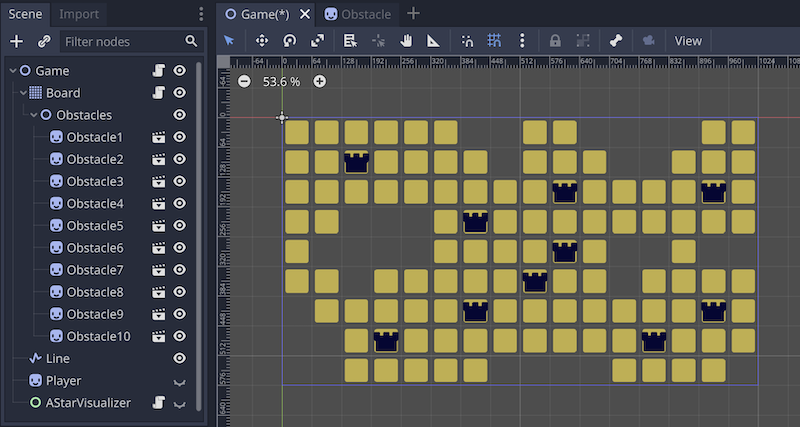
Player (Sprite) node
This node is used as a player piece to be moved on the board by path finding using AStar.
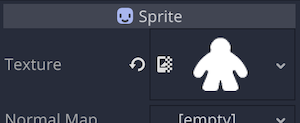
- In the Inspector, drag & drop “character.png” from the file system dock to the “Texture” property and apply the resource.
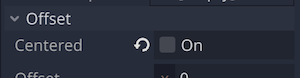
- Turn off the “Offset” > “Centered” property.
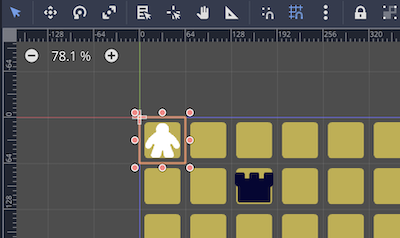
- In the 2D workspace, make sure the player is placed at the coordinates (0, 0), which is its initial position.
Control by script
Attach the script to the Board node
Path finding by the AStar algorithm roughly follows the following flow.
- Get the position of a tile placed on the tile map.
- Add tile positions as AStar points.
- Connect each AStar point to the adjacent points on the top, bottom, left and right.
- Get the position of obstacles.
- Disable points on AStar corresponding to the position of an obstacles.
- Find paths in the line connecting the valid points of AStar.
Attach the script to the “Board” node and edit the code as follows:
extends TileMap

# Array to store the points of the path the Player will move
var path: Array = [].
# Array of cells where tiles are placed in Board(TileMap)
var cells = get_used_cells()

# Reference to the Obstacles node
onready var obstacles = $Obstacles
# An instance of the AStar2D class
onready var astar = AStar2D.new()
# Half the size of a cell in Board(TileMap)
onready var half_cell_size = cell_size / 2


func _ready():
    # Call the method to add points of AStar
	add_points()
    # Call a method to connect points of AStar
	connect_points()
    # Call a method to deactivate points of AStar
    # The argument is a method that returns the positions of the child nodes of the Obstacles node as an array
	disable_points(get_obstacles())


# Method to add points of AStar
func add_points():
    # Loop over the cells where tiles are placed on the tile map
	for cell in cells:
        # Generate cell IDs and add them as points of AStar
		astar.add_point(id(cell), cell)


# Method to connect points of AStar
func connect_points():
    # Loop through the cells where tiles are placed on the tile map
	for cell in cells:
        # If the cell is in an AStar point
		if astar.has_point(id(cell)):
            # Create an array of direction vectors in the four adjacent directions
			var neighbors = [
				Vector2.RIGHT,
				Vector2.LEFT,
				Vector2.DOWN,
				Vector2.UP
			]
            # Loop processing for each direction vector
			for neighbor in neighbors:
                # Define neighbor cells
				var next_cell = cell + neighbor
                # If a tile is placed in a neighbor cell
				if cells.has(next_cell):
                    # Connect the points on the original cell of AStar with the points on the neighbor cell
					astar.connect_points(id(cell), id(next_cell), false)


# Method to return the positions of the child nodes of an Obstacles node as an array
func get_obstacles() -> Array:
    # An array containing the grid coordinates of the cell where the obstacle is located
	var obstacle_cells = [].
    # Loop over all child nodes of Obstacles (Obstacle instances)
	for child in obstacles.get_children():
        # Add the grid coordinates of obstacles to the prepared array
		obstacle_cells.append(world_to_map(child.global_position))
    # Return an array as a return value
	return obstacle_cells


# Method to invalidate points of AStar
# Pass an array whose elements are the grid coordinates of the cell as an argument
func disable_points(target_cells):
    # Loop over the elements of the argument array (cell grid coordinates)
	for cell in target_cells:
        # disable the point of AStar corresponding to the cell
		astar.set_point_disabled(id(cell))


# Method to update the shortest path (array of points to pass) for the Player to move
func update_path(start, end):
    # Find the shortest path from the starting point of the argument to the destination point in AStar
	path = astar.get_point_path(id(start), id(end))


# Method to generate ID from grid coordinates
func id(point):
	var a = point.x
	var b = point.y
	return (a + b) * (a + b + 1) / 2 + b
This will add AStar points to the coordinates of the cell where the tile is placed in the “Board (TileMap)” node, and each point will be connected by a line. Furthermore, the points that correspond to the coordinates of the “Obstacle” instance are deactivated, and the lines connecting them are also deactivated. The network of AStar finally formed in this way is used as a route.
The update_path() method will be called in the script of the “Game” node. When calling this method, pass the current position and the destination position of the “Player” node to the arguments start and end, respectively, and the Player node will move along the shortest path on the AStar network that has been formed.
Of course, the positions of the “Obstacle” instances is not connected to the line because the AStar points are disabled, so the Player node cannot move to the positions.
It may be difficult to visualize the AStar points and lines, so I will attach a script to “AStarVisualizer” to visualize them.
Attach a script to the “AStarVisualizer (Control)” node
To visualize AStar points and lines, attach a script to “AStarVisualizer” and edit the code as follows:
extends Control


onready var board: TileMap = get_parent().get_node("Board")
onready var astar: AStar2D = board.astar
onready var offset: Vector2 = board.half_cell_size


# Call the _draw() function when a node is loaded into the scene tree
func _ready():
	_draw()

# Override built-in function _draw() to draw AStar points and lines on the screen
func _draw():
    # Loop over all points (IDs) in AStar
	for point in astar.get_points():
        # Skip the next step if the point is deactivated
		if astar.is_point_disabled(point):
			print("astar point is disabled")
			continue

        # Convert from AStar points (IDs) to grid coordinates
		var cell = astar.get_point_position(point)
        # Convert from grid coordinates to world coordinates
		var pos = board.map_to_world(cell)
        # Draw the world coordinate of the point of AStar shifted from the upper left corner of the cell to the center
		draw_circle(pos + offset, 4, Color.white)

        # Get all the points (IDs) connected to the acquired AStar point
		var point_connections = astar.get_point_connections(point)
        # Array to store all connected points as world coordinates
		var connected_positions = [].

        # Loop over connected points
		for connected_point in point_connections:
            # If connected points are deactivated, skip this step
			if astar.is_point_disabled(connected_point):
				print("connected point is disabled")
				continue
            # Convert IDs of connected points to grid coordinates
			var connected_cell = astar.get_point_position(connected_point)
			# Convert grid coordinates to world coordinates
            var connected_pos = board.map_to_world(connected_cell)
            # Add world coordinates to array
			connected_positions.append(connected_pos)

        # Loop through the elements of the array of world coordinates of connected points
		for connected_pos in connected_positions:
            # Draw a line connecting the original point and the connected points
			draw_line(pos + offset, connected_pos + offset, Color.white, 2)
With this script, the AStar points and lines are drawn on the screen and the AStar network can now be visualized. When you run the project, you should see the following.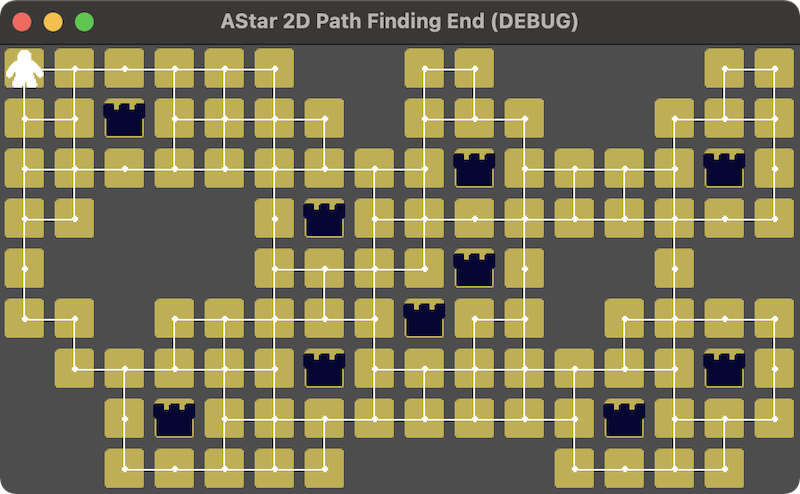
Attaching scripts to the Game node
The last step is to code the “Player” node to move when the mouse is pressed.
After attaching the script to the “Game” root node, edit the code as follows:
extends Node2D

# Referencing the Board node
onready var board = $Board
# Referencing the Line node
onready var line = $Line
# Referencing the Player node
onready var player = $Player


func _input(event):
    # If the left mouse button is clicked
	if event.is_action_pressed("move_to"):
        # Get grid coordinates from mouse cursor world coordinates as destination
		var target_cell = board.world_to_map(get_global_mouse_position())
        # Generate ID from the grid coordinates of the target cell
		var target_cell_id = board.id(target_cell)
        # If the ID is contained in a valid point for AStar
		if board.astar.has_point(target_cell_id):
            # Get the coordinates of the cell on the tile map from the Player's world coordinates
			var player_cell = board.world_to_map(player.global_position)
            # Update the path from Player's cell to the destination cell
			board.update_path(player_cell, target_cell)
            # Call a method to move the Player node
			move()


# Method to move the Player's piece
func move():
    # Disable the input process so that no click operations are possible during the move
	set_process_input(false)
    # Draw the path of the Line node by looping through the grid coordinates of the path points
	for point in board.path:
        # Convert grid coordinates to world coordinates and add to path of Line node
		line.add_point(board.map_to_world(point) + board.half_cell_size)

	# Move Player node by looping through path in grid coordinates of the path points
	for point in board.path:
        # Convert the grid coordinates of the point to world coordinates and overwrite the position of the Player node with it
		player.global_position = board.map_to_world(point)
        # Wait 0.1 seconds
		yield(get_tree().create_timer(0.1), "timeout")
	# Clear the points in the path of the Line node when move is complete
	line.clear_points()
    # Enable input process
	set_process_input(true)
With this script, the “Player” node can be moved by left mouse click. The AStar algorithm determines the shortest path from the grid coordinates where the “Player” node is located to the grid coordinates where the mouse cursor overlaps when left-clicked, and moves the “Player” node along that path.
If you run the project, you should see the following GIF image.
Conclusion
In this article, I introduced a grid-based 2D path finding using the AStar algorithm. The project we have created should work equally well with different placement of tiles and obstacles.
Finally, let me summarize the main points of this tutorial.
- Godot provides the AStar class, so we can use it.
- Convert world coordinates ⇄ grid coordinates ⇄ ID as appropriate.
- The sequence of path finding is as follows:
- Add a point of AStar.
- Connect adjacent points of AStar.
- Disable AStar points that overlap with obstacles.
*Of course, you can also add only points excluding obstacles in step 1. - Derive the shortest path between the current location and the destination location using the AStar algorithm.
Also, you may be able to make an interesting game by adding the following arrangement.
- Randomly generate tiles and obstacles.
- Place and move multiple characters on the board, both friend and foe.
- In addition to the four directions of up, down, left, right, it is also possible to move diagonally.
References
The following resources were very helpful in preparing this article.
- YouTube - A* TileMap for Grid-Based PATHFINDING in Godot / HeartBeast
- YouTube - A* Path-Finding for Grid-Based Tilemap in Godot / AndOne
- YouTube - 2D Grid-Based Pathfinding (AStar) - Godot Tutorial / GamemakerPixel
- Godot Docs - AStar2D
- KENNEY - Board Game Icons
- Wikipedia - A*