In this article, I’ll explain how to upload an iOS game exported from Godot to App Store Connect using Xcode. It’ll probably be short, so feel free to take it easy. Also, I’m assuming you’re familiar with Xcode, which is a macOS-exclusive app, so I’ll proceed with that in mind. Macs can be pricey, but if you want to release apps like iOS or macOS on the App Store, it’s an essential tool. I got mine with a 2-year Orico loan. It was tough, though 😆
Environment at the time of writing this article
Xcode Version: 15.3 (15E204a)
Computer Model: MacBook Air M1, 2020
OS: macOS 14.4.1
Working with Xcode
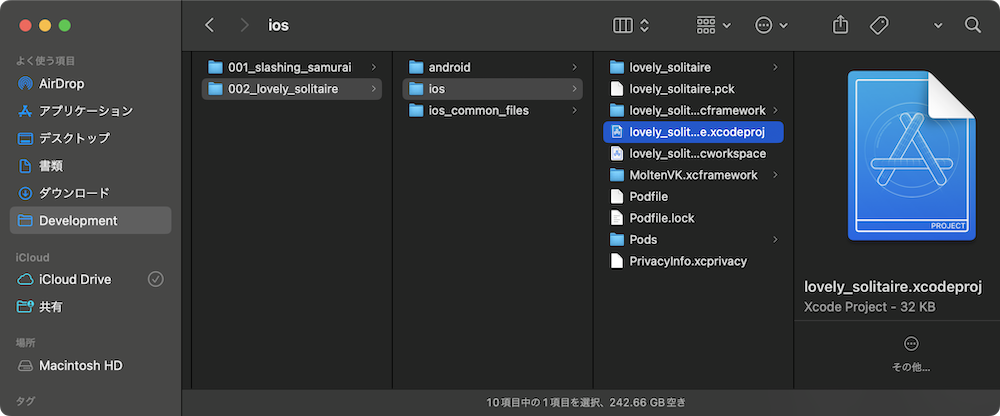
First, let’s open the project for the iOS version of your game exported from Godot in Xcode. If you peek into the folder where you exported it via Finder, you’ll find a file with a .xcodeproj extension. Just double-click on that (if there’s a .xcworkspace file generated due to adding plugins like Google AdMob, open that instead, but I won’t dive into that here).
Enabling Game Center Capability in Xcode
*You can skip this section if you don’t plan to integrate with Apple’s Game Center.
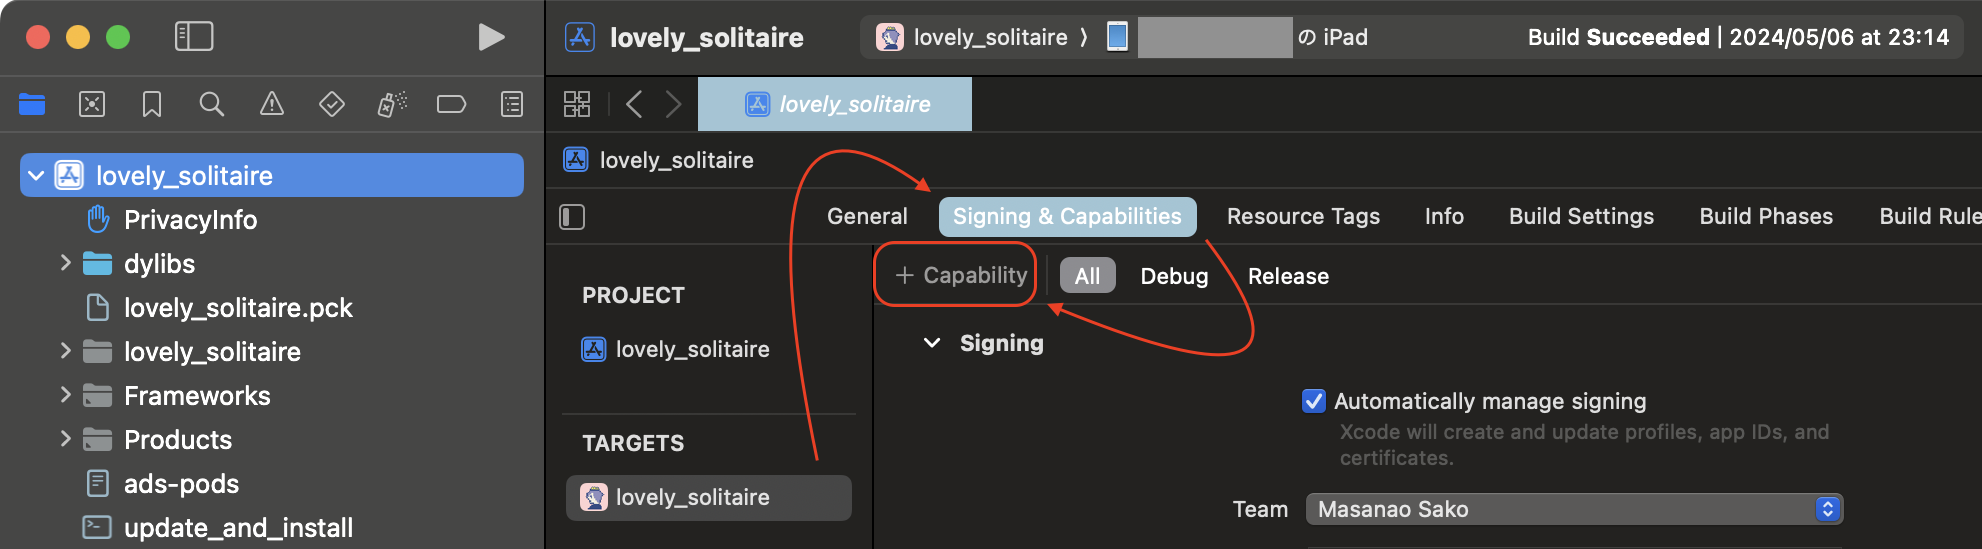
Once you’ve opened the project in Xcode, with the TARGETS sidebar selected, switch to the Signing & Capabilities tab, then click the + Capability button at the bottom left of that panel.
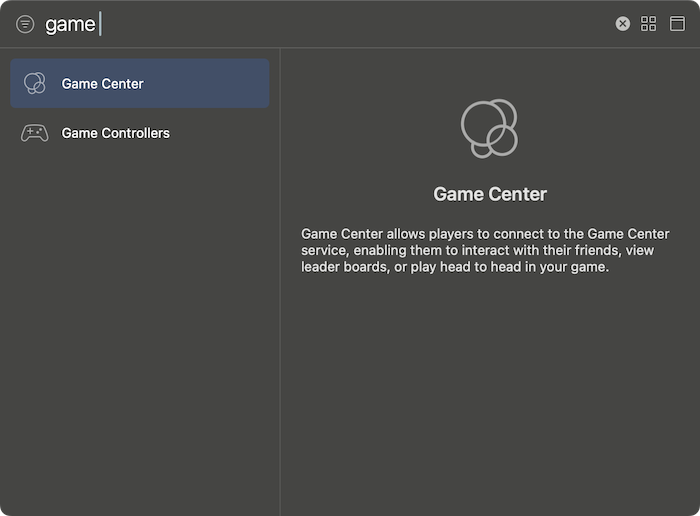
Then, filter by “game” in the panel. You’ll quickly find the Game Center item. Double-click on it, and the Game Center feature of your project will be truly enabled.
Archiving the Project in Xcode
Once you’ve opened the project, connect your iPhone or a physical device to your Mac and test it once. Make sure it runs properly, which is obvious but essential.
Using Product menu > Run, Xcode will handle everything from building the game to installing it on the device and launching it. If it runs error-free on the device, you’re good to go. If you don’t have a physical device, you can use the simulator, though in my case, I encountered too many errors and gave up. By the way, if there’s an error during the build process, you won’t be able to proceed with the next steps, so troubleshoot it beforehand. It’s quite a hassle, but yeah, I get it.
Once you’ve confirmed it runs properly, archive the build. It might sound odd, but think of it like inducting a build into the Hall of Fame, ensuring it’s a pristine, playable version of your game.
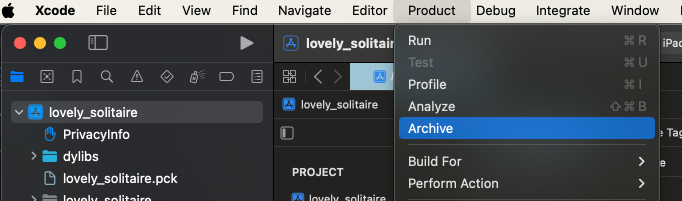
- Choose Product menu > Archive in Xcode.
- Wait for the build to complete (until the progress circle completes).

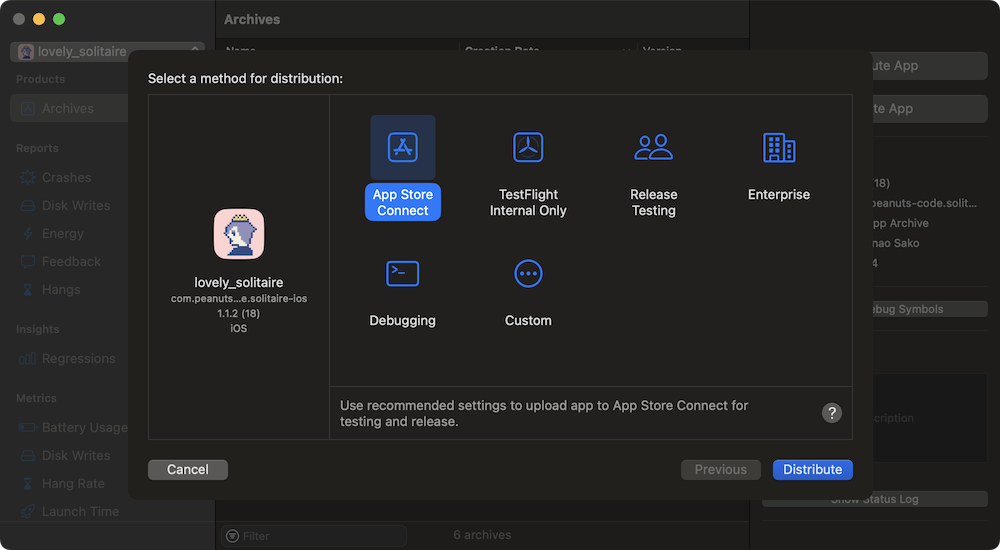
- Once the Organizer window appears, click Distribute App button.
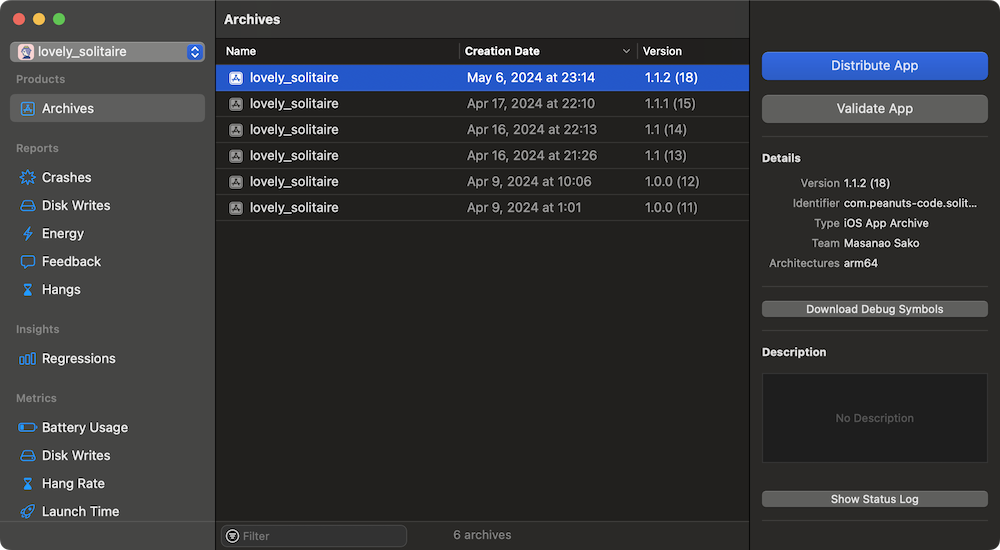
- Choose App Store Connect and click Distribute.

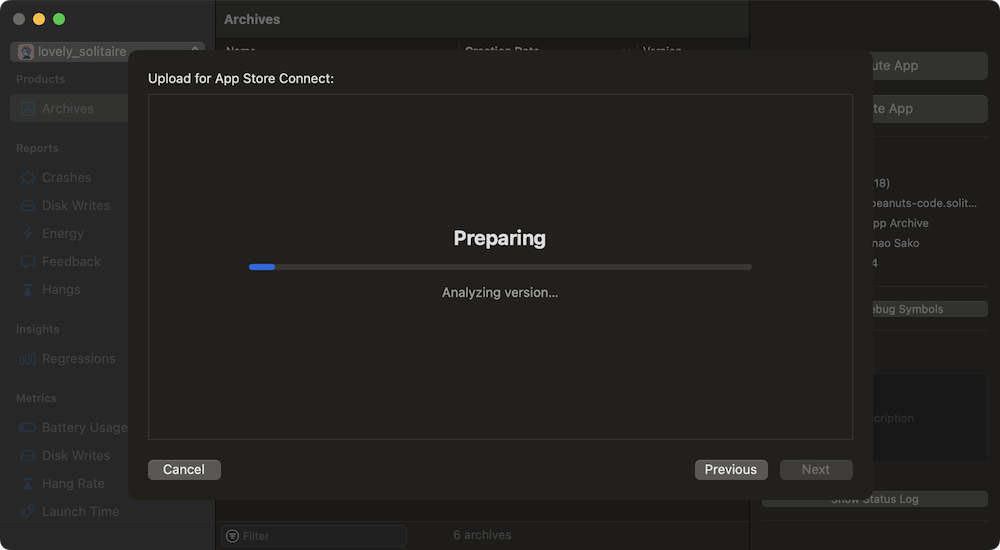
- Wait for the progress bar to complete as it uploads to App Store Connect.
- It’ll take a bit more time until the uploaded app (build) appears in App Store Connect. It’s subjective, but it takes around 5 minutes for me. Once it’s done, you should receive a notification from Apple. You can wait for that.
Checking the Game in App Store Connect
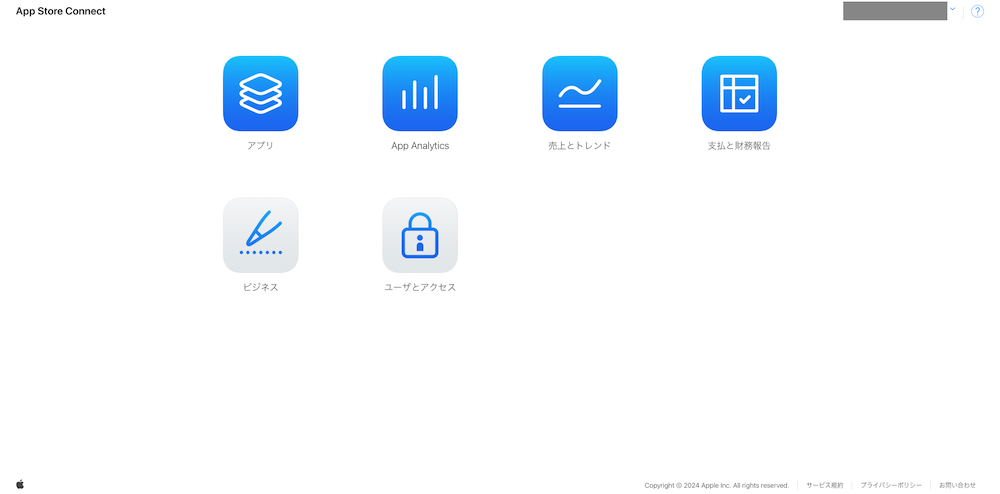
Now, let’s move on to working on App Store Connect. First, access App Store Connect and sign in with your Apple Developer account.
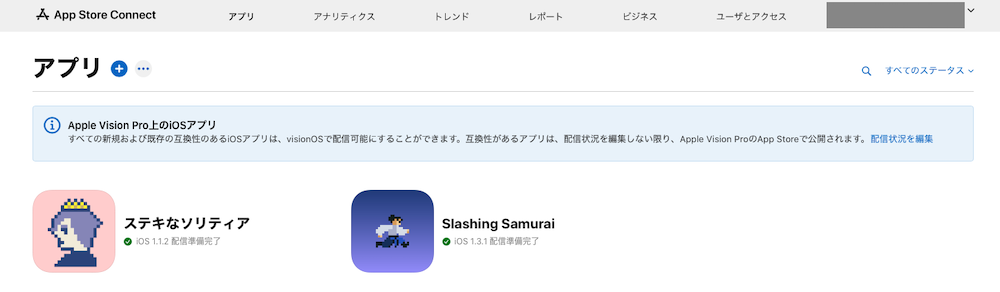
Once signed in, select Apps on the top screen.
Next, you’ll see a list of apps. Your app, which you uploaded from Xcode earlier, should be displayed here. In the screenshot below, you’ll see two game apps I uploaded in the past, but if it’s your first time, you’ll see only one, and it’ll show a different status.
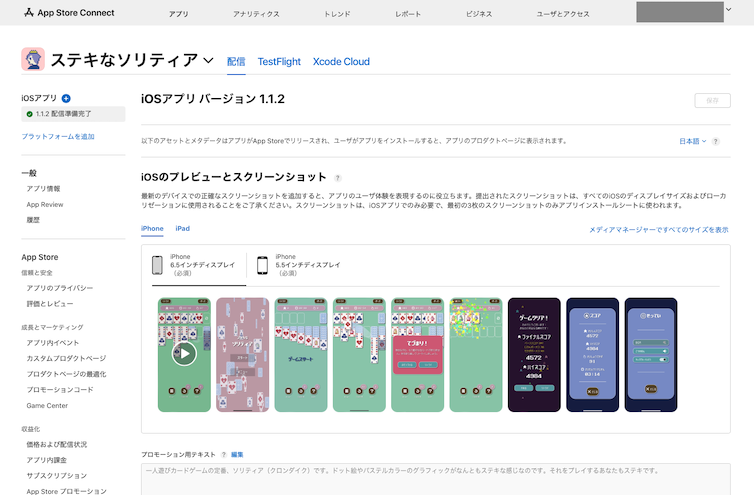
After selecting the app you want to edit from the app list, you’ll be taken to the editing screen. Here, you can configure various settings necessary to distribute your game on the App Store. There are a lot of settings here, so it might be a bit daunting, but giving your best here might lead to a surge in downloads for your app, so don’t slack off.
Conclusion
Game development with Godot can be smooth once you get used to it, but the process after exporting to iOS from Godot and handling it in Xcode can be a bit challenging and unique, so I wrote this article for those moments when you forget the steps.
To summarize the workflow briefly, you open the iOS version of your game exported from Godot in Xcode, then archive it and distribute it to App Store Connect. There will be some waiting time here. Once distribution is done, sign in to App Store Connect and proceed with editing. That’s the gist of it.
If you found this article helpful, I’d be thrilled if you shared it on social media.
Game Promotion
Lastly, I hope you don’t mind, but let me promote my games
that are actually available on the App Store. Thank you.
👹 Slashing Samurai
Test your agility and reflexes now! Can you control the samurai and skillfully cut down various objects falling from the sky? It’s an addictively fun casual timing game that you can play with simple one-handed controls!
🃏 Lovely Solitaire
When it comes to “Solitaire (Klondike),” it’s the king of all single-player card games, but now, the mobile game “Lovely Solitaire” is available on the App Store!
♣️ Quick Hand Poker
When it comes to popular classic casino card games, poker is a standout. However, in the mobile casual game “Quick Hand Poker,” it has been transformed into a puzzle game. The controls are simple—just touch the cards as quickly as possible to form as many poker hands as you can! Available now on the App Store!